

Jira Training for Beginners A Practical Guide for 2026
If you’ve ever felt the pain of a project spiraling out of control, you're in the right place. This isn't your standard, dry Jira training for beginners. It’s a practical guide built from years of experience helping B2B, SaaS, and agency teams ditch the project chaos for good. Think of it as the operational blueprint for scaling without the growing pains.
Why Jira Is Your Team's New Best Friend
Let's get one thing straight: Jira isn't just a complicated tool for software developers anymore. For any fast-moving agency or SaaS company, it's the answer to the chaos of overflowing inboxes, endless spreadsheets, and the dreaded "any updates on this?" question. It brings all your work into one place, turning vague goals into concrete tasks you can actually track and complete.
Instead of hunting down a teammate for a status update on a client request, you just look at the board. This is the real game-changer—moving from constantly reacting to problems to proactively managing your work. In fact, over 75% of teams using agile tools like Jira say it significantly improves how they handle shifting priorities, which, let's be honest, is a daily reality for most of us.

From Simple To-Do Lists to a Cohesive System
Most teams start with simple to-do lists in a notebook or a basic app. But you quickly hit a ceiling. What happens when tasks depend on each other? How do you track a bug fix versus a new feature request? Jira gives your work the structure it needs to scale.
To get started, you just need to understand a few fundamental building blocks. These are the core concepts that everything else in Jira is built upon.
Jira's Core Components at a Glance
Before we dive deeper, here's a quick cheat sheet for the main terms you'll see. Understanding these four components is the first step to mastering Jira.
| Component | What It Is | Primary Use Case |
|---|---|---|
| Projects | A container or folder for all work related to a single goal. | Organizing tasks for a new client onboard, a website redesign, or a software release. |
| Issues | An individual piece of work within a project. | A single task (e.g., "Write blog post"), a bug ("Login button not working"), or a user story. |
| Workflows | The set of statuses an issue moves through from start to finish. | A simple path like To Do → In Progress → Done, or something more complex for approvals. |
| Boards | A visual dashboard of your workflow, typically using columns. | Seeing the status of all work at a glance during a daily stand-up meeting. |
Once you get the hang of these, you can start tackling bigger picture planning. For those managing massive projects, you might want to learn more about creating initiatives in Jira to connect your team's work directly to high-level business goals.
Finally, Get True Visibility Into Your Projects
Real visibility isn’t just knowing who is working on what. It’s about seeing the connections between tasks, spotting bottlenecks before they derail your timeline, and making decisions based on actual data, not just gut feelings.
"Change management is about managing the chaos of changing humans from one habit to another. Jira provides the structure to guide that change effectively."
By having all your tasks, conversations, and files in one place, Jira kills the "who has the latest document?" email for good. It creates a complete audit trail for every single task, which is a lifesaver for client reporting and internal reviews. This is how you build an operation that can grow without breaking.
Setting Up Your First Jira Project From Scratch
Alright, let's get our hands dirty. Opening up a new Jira account for the first time can be a little intimidating, but we're going to cut through the noise and build your first project together. Getting this initial setup right is probably the most critical part of this whole guide. The choices you make right now will either become the foundation for a smooth, organized workflow or a source of constant headaches down the road.
The very first decision you have to make is your project template. While Jira throws a bunch of options at you, it really just boils down to two main philosophies for most B2B and agency teams: Kanban and Scrum. The right choice depends entirely on how your team actually works.
Kanban vs. Scrum: Which Template to Choose?
Here’s the simplest way I can put it: Kanban is all about continuous flow, whereas Scrum is built around structured cycles.
Choose Kanban if: Your team is constantly juggling a stream of incoming tasks where priorities can change on a dime. This is a perfect fit for an agency's client services team handling endless requests for ad copy, landing page updates, and urgent bug fixes. Work just moves from a backlog to "Done" as capacity allows.
Choose Scrum if: Your work is better suited to structured, time-boxed efforts called sprints. Think of a SaaS development team building a new integration over a two-week period. The team agrees on a specific chunk of work for that sprint and focuses exclusively on hitting that goal.
If you're on the fence, I almost always recommend starting with Kanban. It's more flexible and forgiving, especially when your team is still figuring out its own processes.
I’ve seen so many teams pick Scrum because it sounds more “professional,” only to abandon it because they don’t have the discipline for daily stand-ups, sprint planning, and retrospectives. Be honest about your team's current habits. You can always switch to Scrum later.
Once you’ve picked a template, you'll need to give your project an identity. This is more than just a name; it’s about creating a system that scales with you.
Naming Conventions and Basic Configuration
A project list with names like "Marketing," "New Website," and "Client X Launch" will become a chaotic mess in no time. You need a naming convention that gives you context instantly.
A good naming convention for an agency might look like this:
- ACME-WEB: A website rebuild project for the client "Acme Corp."
- ACME-SEO: The ongoing SEO retainer for that same client.
- INT-MKTG-Q3: An internal project for the marketing team's Q3 initiatives.
This simple prefix system makes your projects easy to find and keeps your workspace tidy as you grow from 5 to 50 projects.
Next, Jira will ask you for a project key and a lead.
- Project Key: This is a short code (3-5 letters) that gets attached to every task in that project (e.g., a task for the website project might be "ACME-WEB-12"). Jira will suggest one based on your project name—just go with that.
- Project Lead: This should be the person who is ultimately accountable for the project's success. They get extra permissions within that specific project to manage settings and people.
Your project is now officially live! The last piece of the puzzle is to get your team in. Just go to Project settings, then find the People section. From there, you can add your teammates and set their roles, like Administrator, Member, or Viewer, to control what they can see and do.
And that's it. You've just laid a solid groundwork for your first project. By being thoughtful with these first few steps, you’ve already dodged some of the most common issues that trip up new Jira users.
Using Issues and Custom Fields for Total Clarity
Alright, with your project shell built, it’s time to get into the heart of Jira: issues. Every single thing your team does will be captured in an issue. Think of them as the individual work items—the cards on your board—that track everything from a minor bug fix to a massive feature launch. Getting comfortable with issues is the single most important step in moving from a beginner to a pro.
Most teams can get a ton of mileage out of Jira’s standard issue types right out of the box. They create a shared vocabulary, so everyone knows exactly what kind of work is on their plate.
The Standard Issue Types Explained
While you can cook up your own issue types later, almost every project I've ever worked on starts with these four. Knowing the difference isn't just academic; it's how you keep your backlog from turning into a junk drawer.
- Story: This is a feature request written from your user's point of view. For instance: "As a customer, I want to reset my password using my email." Stories are all about delivering value to the end user.
- Task: This is a straightforward to-do item. It's work that has to get done but doesn't necessarily add a new feature for a user. Think things like, "Set up the new staging server" or for an agency, "Pull the monthly client performance report."
- Bug: Pretty self-explanatory—something's broken. A bug is a problem that stops the product from working as intended. A classic example: "The 'Add to Cart' button is unresponsive on the product page."
- Epic: This isn't just one task; it's a big bundle of work. An Epic is a massive initiative that you break down into smaller, manageable Stories, Tasks, and Bugs. For example, "Q3 Website Redesign" would be an Epic, containing dozens of individual issues needed to get it done.
When you use these correctly, the clarity is immediate. A developer sees a "Bug" and knows it's reactive, problem-solving work. They see a "Story" and know they're building something new. To really get a feel for how these pieces fit together, you can dig into the relationship between Jira Epics and Stories in our detailed guide.
Where the Real Magic Happens: Custom Fields
The standard issue types are your foundation, but custom fields are how you build a system that’s truly your own. This is where you stop using a generic tool and start using your project management system, tailored to how your business actually operates.
Custom fields let you tack on specific, required pieces of information to every issue. It's the secret to making sure crucial details don't get buried in a long comment thread or tracked in a separate spreadsheet.
For instance, a digital marketing agency I worked with added a simple “Client Name” dropdown to every single task. Overnight, they could filter their entire company's workload by client, which made reporting and resource planning incredibly simple.
Your goal with custom fields is to capture all the information someone needs to get a task from "To Do" to "Done" without having to ask a single question. If you find your team constantly asking for the same details, you've just found a perfect candidate for a new custom field.
Practical Examples of Powerful Custom Fields
The possibilities here are pretty much endless, but let's run through a few real-world examples that I've seen make a huge difference.
For an Agency:
- Approval Stage: A dropdown with options like "Internal Review," "Pending Client Feedback," and "Client Approved." This gives anyone a 2-second status check on where creative work is in the review cycle.
- Client-Facing Due Date: Jira has a default due date, but I always recommend a separate "Client-Facing Due Date" field. It helps the team distinguish between the internal goal and the hard external deadline.
- Service Line: A dropdown to tag tasks with "SEO," "PPC," or "Content Marketing." This makes tracking budgets and profitability by service a breeze.
For a SaaS Company:
- Priority Score: A number field (say, 1-10) that gives product managers a more granular way to rank features than the basic "High/Medium/Low" options.
- Customer Ticket ID: A simple text field to link a Jira issue directly to a support ticket in a platform like Zendesk or Intercom. This connection is invaluable for the support team.
- Affected Version(s): A field where you can tag which version(s) of your software are impacted by a bug.
Adding these is surprisingly easy. If you're a project admin, just head to Project Settings > Issue Types. From there, you can add and assign fields. My advice? Start small. Find your biggest communication headache and add one or two fields to solve it. You'll be shocked at how much it cleans up your workflow.
4. Visualizing Your Workflow With Jira Boards
If you can't see the work, you can't manage it. It's really that simple. This is why Jira Boards are the absolute command center for any effective team. They take what could be a messy, overwhelming list of tasks and turn it into a living, breathing picture of your entire workflow. At a glance, you know exactly where everything stands.
You'll primarily work with two kinds of boards in Jira: Kanban and Scrum. They each have a different philosophy, and picking the right one is a crucial first step that shapes how your team plans, works, and gets things done.
Kanban Boards for Continuous Flow
Think of a Kanban board as your go-to for managing a steady, continuous stream of work. It’s perfect for teams that don't operate in rigid, time-boxed cycles. Instead, they just pull the next most important task from the backlog whenever they have the capacity.
A content marketing agency is a classic example. Their work is a constant pipeline:
- Ideas: A big list of potential blog posts.
- Writing: An author grabs an idea and starts drafting.
- Editing: The finished draft moves to an editor for a polish.
- Client Review: The article is now with the client for their thumbs-up.
- Published: It's live!
Using a Kanban board, the project manager can instantly spot bottlenecks. Are five articles piling up in the "Client Review" column? That's a red flag. It tells them it's time to send a follow-up or check in with the client. The whole point is to keep work flowing smoothly from one stage to the next.
Scrum Boards for Structured Sprints
A Scrum board, on the other hand, is built for teams that work in structured, time-boxed cycles called sprints. These sprints usually last one to four weeks and start with the team committing to a specific chunk of work they believe they can finish in that time.
Imagine a software team building a new feature. They might plan a two-week sprint with a clear Sprint Goal, like "Launch the user profile page." The Scrum board is then used to track every single task related to that goal. This makes daily stand-up meetings incredibly focused—everyone can see what was finished yesterday, what they're tackling today, and what, if anything, is blocking their progress.
The key takeaway: Kanban is all about optimizing the continuous flow of individual tasks. Scrum is about delivering a working, valuable increment of the product within a fixed period.
Kanban vs Scrum: Which Board Is Right for Your Team?
Choosing between Kanban and Scrum can feel like a big decision, but it's really about matching the board to your team's natural rhythm. This table breaks down the core differences to help you decide.
| Factor | Kanban Board | Scrum Board |
|---|---|---|
| Best For | Teams with a continuous workflow (e.g., support, content, operations) | Teams building a product in iterations (e.g., software development) |
| Planning | Continuous; tasks are pulled from a backlog as capacity allows. | Done at the start of each sprint (Sprint Planning). |
| Cadence | No fixed timeline; focus is on flow and reducing cycle time. | Fixed-length sprints (e.g., 2 weeks) with set ceremonies. |
| Key Metrics | Cycle Time, Lead Time, Work in Progress (WIP) limits. | Velocity, Sprint Burndown charts. |
| Roles | No prescribed roles. | Defined roles: Product Owner, Scrum Master, Development Team. |
| Flexibility | High; priorities and tasks can change at any time. | Low during a sprint; the team commits to the Sprint Goal. |
Ultimately, there's no wrong answer. Many teams even start with one and evolve to the other. The most important thing is to pick a system and give it a real try.
Customizing Columns to Match Your Reality
The default "To Do," "In Progress," and "Done" columns are a decent starting point, but that's all they are—a start. The real magic happens when you customize your board columns to reflect how your team actually works. This is one of the most valuable skills you can learn.
For that agency we mentioned earlier, a more practical board might look like this:
- Backlog: All approved client requests.
- In Progress: Someone is actively working on it.
- Internal Review: Ready for a manager to check.
- Client Approval: Sent to the client, waiting for feedback.
- Revisions: Needs changes based on client comments.
- Done: Completed, delivered, and celebrated.
This setup removes all guesswork. A task in "Client Approval" isn't just vaguely "in progress"—it's in a very specific state that tells everyone on the team what needs to happen next (and who needs to do it).
This diagram shows how different issue types—like Stories, Tasks, and Bugs—move through a workflow you design.
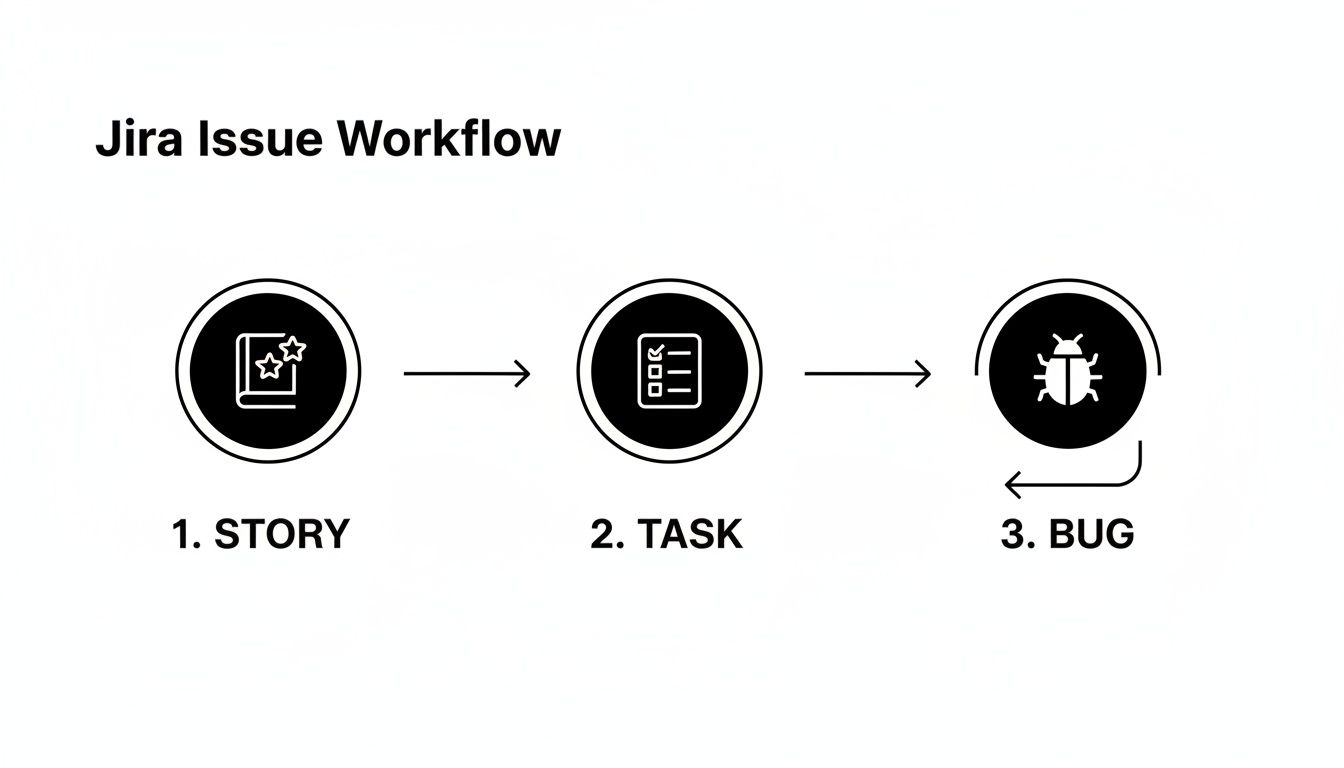
It helps clarify that each issue has a purpose, whether it's building a new feature (Story), knocking out a routine job (Task), or squashing a problem (Bug).
Planning and Running Your First Sprint
So you’ve opted for a Scrum board. Great! Your next move is to plan your first sprint. This happens in a sprint planning meeting where the entire team gets together. You’ll look at the top-priority items in your backlog and pull in a realistic amount of work that you’re confident you can complete within the sprint.
During this meeting, you’ll also define a clear Sprint Goal. This isn't just a list of tasks; it’s a short statement about the overall objective. For instance: "Users can successfully sign up and create a basic profile." This goal acts as a North Star for the team, guiding decisions throughout the sprint.
Once the sprint is live, the board becomes the centerpiece of your daily stand-ups. Instead of giving fuzzy updates, team members point to specific issues on the board, moving them across columns as they make progress. It keeps everyone on the same page and brings blockers to the surface immediately. As your team gets more advanced, mastering scheduling in Jira can help you better manage timelines and resources. When used right, your board transforms Jira from a simple to-do list into a truly active and collaborative hub for your team.
Building Your First Workflow Automation
So far, we've focused on using Jira to organize work. Now for the fun part: making Jira do the work for you. This is where you start to see a real return on your time. We're talking about automation, and it’s the key to killing off all those repetitive, manual tasks that secretly chip away at your team's focus.
Before we can automate, we need to understand the workflow. It’s the structured path an issue takes from start to finish, essentially the set of rules for your board columns. A basic workflow might just be To Do → In Progress → Done. In the real world, you might have stages for QA, client review, or approvals. Automation is what brings this path to life, triggering actions as issues move along.
Demystifying Automation Rules
The good news is you don’t need to be a developer to build powerful automations. Jira’s automation engine is built on a straightforward "When/If/Then" logic that anyone can pick up.
- When (The Trigger): This is the event that kicks everything off. Think "When an issue is created" or "When a priority is updated to Highest."
- If (The Condition): This is your filter. It’s an optional step to make your rule more specific. For example, you only want the rule to fire "If the issue type is a Bug."
- Then (The Action): This is what you want Jira to do. Actions can be anything from assigning the task to the right person, sending a Slack notification, or changing its status.
Let's walk through building one of the most useful automations I've seen teams implement. It provides immediate value and is a perfect first step.
Building a Practical "New Bug" Automation
Picture this: a customer reports a critical bug. Manually, someone has to spot the report, create a Jira ticket, figure out who’s on bug duty, and then ping them. It’s a process riddled with delays and potential for things to fall through the cracks. We can automate that entire sequence.
Our goal is to create a rule that:
- Triggers when a new issue with the type "Bug" is created.
- Assigns that bug directly to our lead developer automatically.
- Notifies the engineering team in a specific Slack channel.
Here’s how we'd build that in Jira's automation setup:
Trigger: When: Issue created
Simple enough. We're telling Jira to listen for any new issue being created in this project.
Condition: If: Issue fields condition
This is where we get specific. Without this, every new task would get assigned to your developer! We’ll set this condition to Issue Type equals Bug, so it only runs for actual bugs.
Action 1: Then: Assign issue
Next, we tell Jira who gets the hot potato. We'll set this action to Assign to: [Lead Developer's Name]. Now, the moment a bug is logged, it lands directly on the right person's plate. No more triage meetings just to assign work.
Action 2: Then: Send Slack message
Finally, let's make sure everyone is aware. After connecting Slack, we can have Jira post a custom message like: "🚨 New Bug Created: [Issue Summary]. Assigned to [Assignee Name]." to the #dev-alerts channel.
With these few clicks, you’ve created a process that’s faster, more reliable, and completely hands-off. This is a core concept in any good Jira training for beginners because it demonstrates how the tool can actively improve how you work, not just track it.
This is just the beginning. You could easily add another action to set the bug's priority to "High" or add a label like "needs-triage." The real power lies in stacking these simple logic blocks to build a workflow that perfectly mirrors your team's process.
The true potential of automation unlocks when you connect Jira to your other tools. Imagine a new client onboarding project being created in Jira the second a deal is marked "Closed-Won" in your CRM. For more complex integrations or to connect Jira with other systems, you can explore professional AI automation services that specialize in bridging those gaps.
Common Jira Pitfalls and How to Sidestep Them
I've seen it happen dozens of times: a team is excited to get started with Jira, but within a few weeks, the boards are a ghost town and everyone's gone back to using spreadsheets and email chains. It's rarely the tool's fault. More often than not, it's a few classic, easy-to-avoid missteps right at the beginning.
The biggest trap is trying to build your "perfect" workflow on day one. It's so tempting to map out a beautiful, ten-step process with stages for every contingency. But in reality, this just creates a "workflow graveyard" where tasks get stuck because nobody is quite sure what "Awaiting Sub-Task Synergy" even means. The process becomes the problem, and your team quickly gives up.
My advice? Start with the absolute basics: a three-column board with To Do, In Progress, and Done. That's it. You'll quickly spot where the real bottlenecks are. When tasks start piling up in "In Progress" because they're all waiting for a manager's sign-off, that's your signal to add an "Internal Review" column. Let the workflow evolve based on real-world friction.
The Curse of Too Many Custom Fields
Right behind workflow over-engineering is the custom field catastrophe. In an effort to capture every possible piece of data, teams create a dozen custom fields for every task. Suddenly, creating a simple "fix a typo" ticket feels like filing your taxes. The result is the same: your team avoids creating tickets, and the data you do get is inconsistent and messy.
My rule of thumb is simple: only add a custom field when you notice your team asking the same exact question in the comments over and over again. If you see the same question three or four times, it's earned its place as a field.
For instance, an agency I worked with kept seeing comments like, "Which client is this for?" on almost every marketing task. That was the perfect trigger to add a mandatory "Client" dropdown field. It immediately cleaned up their process and made reporting a breeze.
Keep Permissions and Roles Simple
Another common mistake is getting bogged down in permissions. It's easy to create a complex web of user roles, restricting who can do what. But this "permission paralysis" often just creates headaches. You'll spend more time troubleshooting why someone can't move a ticket than they would have spent doing the actual work.
Start with Jira's basic roles—Admin, Member, and Viewer—and stick with them until a genuine security or operational need forces you to get more specific.
Ultimately, a successful Jira launch is about building good habits, not a perfect system. Keep it simple and let the tool grow with you. It’s far easier to add a little complexity later than it is to untangle a mess.
Common Questions as You Get Started with Jira
Alright, we've covered a lot of ground. It's completely normal to have a few questions swirling around as you begin to imagine how Jira will actually fit into your team's day-to-day. Let's tackle some of the most common questions I hear from teams just starting their Jira journey.
How Quickly Can I Learn Jira?
Honestly, you can get the hang of the basics—creating issues, commenting, and moving cards across a board—in just a few days of active use. For most users, it takes about a week to feel truly comfortable with their daily tasks in Jira.
The real learning curve comes with the admin-level stuff, like configuring project settings or building a custom workflow from scratch. For that, you should expect to spend a few weeks experimenting. My best advice? Start simple. Get a basic board running first and only add complexity when you have a specific problem to solve.
As you get more comfortable and want to master the platform, check out these great online course tips to help you retain what you learn.
Is Jira Only for Tech Teams?
Not anymore! While Jira got its start with software developers, its flexibility is its biggest strength today. With the right template and a little customization, it can run workflows for almost any team.
I’ve seen it work wonders for:
- Marketing Teams: Using a Kanban board to visualize their entire content pipeline, from the first idea to the final published article.
- HR Teams: Tracking applicants through every stage of the hiring process with custom fields and automated notifications.
- Operations: Managing office moves, new hire onboarding, and other internal projects all in one place.
The secret to making Jira work for a business team is to not force a developer's process on them. Customize Jira to match how your team already thinks and works—just with more structure and visibility.
What Is the Difference Between Jira Software and Jira Work Management?
This is a huge point of confusion, so let's clear it up.
Jira Software is the classic, feature-rich version built for teams that develop products. It’s packed with specialized tools for agile methodologies like Sprints, story points, release planning, and integrations with code repositories.
Jira Work Management, on the other hand, was created specifically for business teams like marketing, HR, and finance. It replaces the complex developer tools with simpler views like calendars, lists, and forms. It’s perfect for general project and task management without the agile overhead.
At MakeAutomation, we live and breathe this stuff. We help agencies and SaaS companies implement tools like Jira and build scalable systems that cut out the manual work holding them back. If you’re ready to get your operations running smoothly, see how we can help at https://makeautomation.co.