
A Guide to Docker File FROM for SaaS Automation
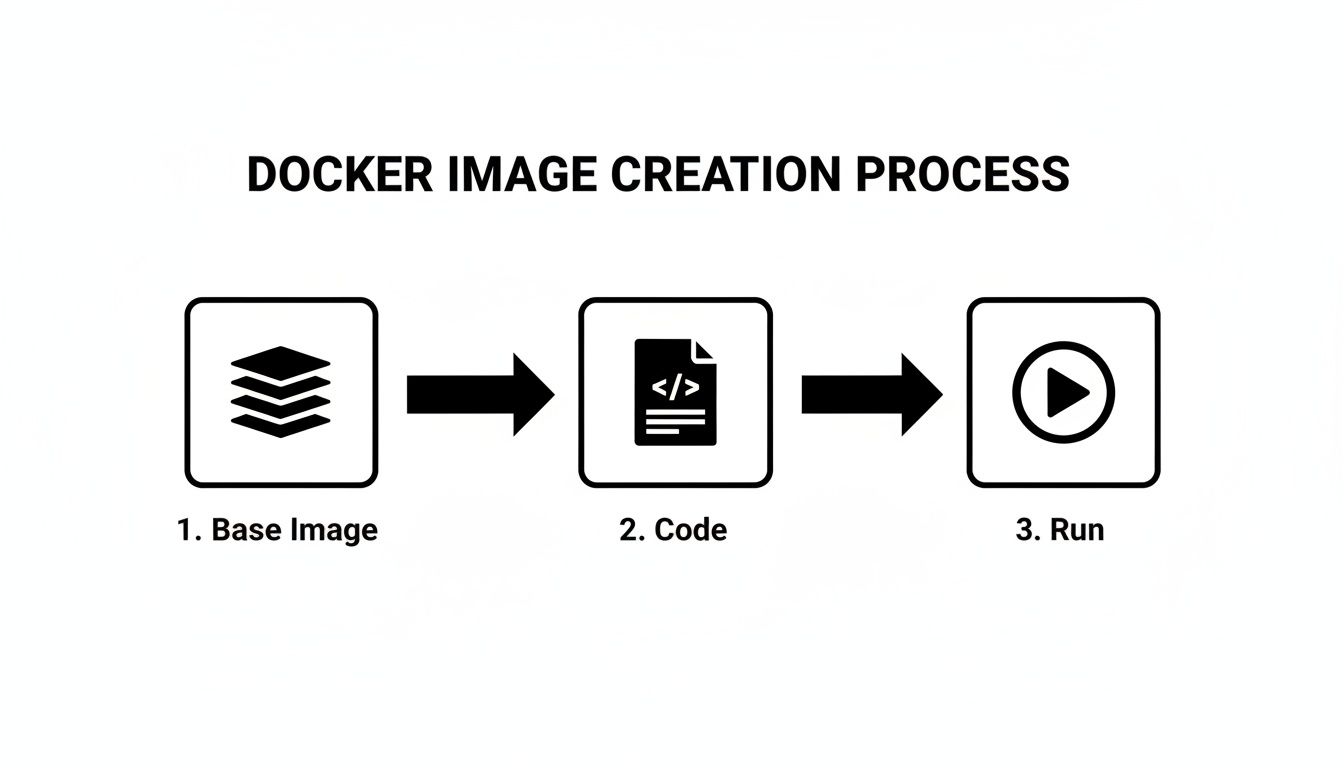
Every Dockerfile you write will start with a single, mandatory instruction: FROM. This line is the cornerstone of your entire container image, setting the base image that everything else is built upon. Whether you choose ubuntu:22.04 or node:20-alpine, you're defining the starting operating system and core tools for your application.
This one decision has a ripple effect, influencing your final image's size, security profile, and even its performance.
Why the FROM Instruction Is Your Most Important Choice

Think of it like choosing the foundation for a building. You wouldn't pour a foundation for a shed if you plan on building a skyscraper. The FROM instruction is your container's foundation. It provides the entire environment where your application will live and breathe.
Honestly, it's the most critical decision you'll make when writing a Dockerfile. It sets the stage for every subsequent step, from package installation to the final command that runs your code. For anyone working in a SaaS or B2B development workflow, getting this right from the start means more reliable, secure, and speedy CI/CD pipelines.
Breaking Down the Syntax
The basic syntax is pretty straightforward: FROM <image>[:<tag>]. A common example you’ll see is FROM python:3.11-slim, which pulls a specific, lightweight version of the official Python image. But the instruction is more powerful than it looks at first glance.
For true build reproducibility, you can specify an image by its immutable SHA256 digest: FROM python@sha256:abcd.... This is a best practice that guarantees your builds are identical every time, protecting you from unexpected changes that can happen even with versioned tags.
Key Takeaway: I can't stress this enough: always pin your base image to a specific tag or, even better, a digest. Relying on
:latestis a classic rookie mistake that injects a huge amount of unpredictability into your builds. The base image can change underneath you without any warning.
The right FROM instruction gives your application the stable OS and tooling it needs to run consistently across different virtual server environments. Its impact is felt all the way through the development lifecycle.
The flexibility of the FROM instruction is one of its biggest strengths. Here's a quick look at the different ways you can use it.
Dockerfile FROM Syntax Variations
| Syntax | Example | Use Case |
|---|---|---|
| Basic Tag | FROM ubuntu:22.04 |
Pulling a specific version of a public image. Simple and common. |
| Digest Pinning | FROM alpine@sha256:123... |
Ensuring absolute build reproducibility by using an immutable hash. |
| Multi-Stage Naming | FROM node:20 AS builder |
Naming a build stage so you can copy artifacts from it later. |
| Private Registry | FROM registry.mycompany.com/base/image:1.0 |
Pulling a proprietary or custom base image from a private registry. |
| Platform Specific | FROM --platform=linux/amd64 node:18 |
Forcing the build to use a specific architecture, crucial for cross-compiling. |
Each variation solves a different problem, from ensuring stability to enabling advanced build patterns.
Advanced FROM Techniques
The FROM instruction really shines when you move into more complex scenarios. Need to pull from a corporate registry? No problem. Just use the full path: FROM my-private-registry.com/my-app:1.2.3. This is standard practice for any team working with proprietary code.
This command is also the engine behind multi-stage builds. A line like FROM node:20-alpine AS builder creates a temporary build environment. You can use this "builder" stage to compile code, install dev dependencies, and run tests before copying only the necessary artifacts into a clean, minimal final image.
It's no surprise that Docker has seen such widespread adoption. With an 87.67% market share and use by over 108,000 companies, mastering these fundamental concepts is non-negotiable for modern developers. This level of market dominance just goes to show how essential containerization has become to DevOps workflows.
Alright, enough theory. Let's get our hands dirty and build something tangible. Nothing solidifies these concepts like containerizing a real application, and a simple Node.js API is a perfect, everyday example for any SaaS developer.
We're going to build a lean, efficient image from scratch. And it all starts with the single most important decision you'll make in your Dockerfile: choosing the right base image with the FROM instruction.
Choosing a Lean Base Image
For a Node.js project, you have a lot of options, but a fantastic starting point is node:20-alpine. I lean on this one a lot, and for good reason.
- It's ready to go: The
node:20part gives us a specific, stable version of the Node.js runtime. No need to install it yourself. - It’s incredibly small: The
-alpinetag is the real hero here. It's built on Alpine Linux, a minimal distribution that drastically cuts down your final image size. This means faster deployments, lower storage costs, and a smaller attack surface.
Let's kick off our Dockerfile with this single, powerful line.
Start from a lightweight Node.js image
FROM node:20-alpine
Just like that, we've laid the foundation. We have a clean, minimal environment with Node.js waiting for our code.
Building the Dockerfile Step by Step
With our base image set, the next job is to get our application code inside and tell Docker how to run it.
First, it’s a great practice to set a working directory. Using WORKDIR keeps your Dockerfile clean and ensures all subsequent commands happen in the right place inside the container.
Create and set the working directory in the container
WORKDIR /app
Now for a crucial optimization trick. Instead of copying all your code at once, copy the package.json and package-lock.json files first, then run your dependency installation.
Copy package files and install dependencies
COPY package*.json ./
RUN npm install
Why do it this way? Docker caches layers. Since your dependencies change far less often than your source code, Docker can reuse the cached npm install layer on subsequent builds. This simple trick can save you minutes every time you rebuild the image after a minor code change.
With dependencies sorted, you can bring in the rest of your source code.
Copy the rest of the application source code
COPY . .
Finally, we need to tell Docker what to do when a container starts. The CMD instruction sets the default command. For a typical Node.js API, that's starting your main server script. We'll also use EXPOSE to document which port the application listens on.
Expose the port the app runs on
EXPOSE 3000
Command to run the application
CMD ["node", "server.js"]
And there you have it—a complete, functional Dockerfile. Every instruction builds on the last, starting with that critical
FROMline and resulting in a runnable application. This is the exact foundation you need to start containerizing your own services. To see more advanced patterns and optimizations, check out our full guide on how to Dockerize a Node.js application.
Slash Image Sizes with Multi-Stage Builds
One of the biggest headaches I see in dev workflows is the bloated, sluggish production image. It’s a classic problem. You’re building a compiled application, maybe a .NET or Go service, and your Docker build needs the full SDK, compilers, and a whole suite of libraries just to get the job done.
If you use a simple, single-stage Dockerfile, all of that baggage—the SDKs, your source code, intermediate files—gets packed right into the final image. The result is a massive, insecure container that's a nightmare for any SaaS company. Large images bog down your CI/CD pipeline, drive up container registry storage costs, and create a huge attack surface full of tools that have no place in a production environment.
Thankfully, the FROM instruction has a powerful feature that gives us an elegant way out: multi-stage builds.
The core idea behind Docker is pretty simple: you start with a base image, add your code, and produce a final, runnable artifact.
With a multi-stage build, we're going to optimize this process by strategically splitting it into two distinct phases: one for building and one for production.
The Problem With Single-Stage Builds
Let's walk through a common but inefficient Dockerfile for a .NET application. This single-stage approach is a perfect example of mixing build tools with the final runtime environment.
An inefficient single-stage build
This uses a large SDK image for both building and running
FROM mcr.microsoft.com/dotnet/sdk:8.0
WORKDIR /source
Copy everything and publish the application
COPY . .
RUN dotnet publish -c Release -o /app
Set the final entrypoint to run the app
WORKDIR /app
ENTRYPOINT ["dotnet", "MyWebApp.dll"]
Sure, this works. But the image it produces is enormous. The .NET SDK image contains compilers and all sorts of other dependencies that are completely useless for just running the compiled app. That single FROM instruction is creating a heavyweight image that’s slow to push, pull, and deploy.
The Multi-Stage Build Solution
Now, let's refactor this into a proper multi-stage build. The technique is surprisingly simple: you just use multiple FROM instructions in the same Dockerfile. Each FROM kicks off a new, temporary build stage.
The trick is to use a big "builder" stage to compile the application, and then switch to a slim "production" stage for the final image, copying only the compiled artifacts over from the builder.
Here’s how we can radically improve our Dockerfile:
Stage 1: The "Builder" Stage
Use the full SDK to build the application
FROM mcr.microsoft.com/dotnet/sdk:8.0 AS builder
WORKDIR /source
Copy project files and restore dependencies first for better caching
COPY *.csproj .
RUN dotnet restore
Copy the rest of the source and publish the app
COPY . .
RUN dotnet publish -c Release -o /app
Stage 2: The Final "Production" Stage
Switch to a lightweight runtime image
FROM mcr.microsoft.com/dotnet/aspnet:8.0
WORKDIR /app
Copy ONLY the published output from the builder stage
COPY –from=builder /app .
ENTRYPOINT ["dotnet", "MyWebApp.dll"]
The magic is all in that
COPY --from=builderline. This command lets us reach back into the temporarybuilderstage and cherry-pick the compiled files from its/appdirectory. All the SDKs, source code, and build tools get left behind, exactly where they belong.
This strategy is absolutely foundational for modern cloud-native development. With 80% of organizations expected to have production Kubernetes deployments by 2026, building efficient containers is no longer a "nice-to-have." You can dig into this trend in the full container report from Datadog.
Why This Is a Game-Changer
By cleanly separating the build environment from the runtime environment, you get some immediate, massive wins:
- Drastically Smaller Images: Your final image is based on the lightweight
aspnetruntime, not the bulkysdk. I've seen this single change reduce image sizes by over 90%. - Improved Security: The production container is clean. No compilers, no build tools, no extra libraries. This massively shrinks your potential attack surface.
- Faster Deployments: Small images are just plain faster. They're quicker to push to registries and faster for orchestrators like Kubernetes to pull and start on a node.
- Cleaner Dockerfiles: The logic becomes self-documenting. One stage builds the code, the next one runs it. Simple.
Multi-stage builds are a fundamental optimization technique that every developer working with containers should master. By using the FROM instruction to define these distinct stages, you can create lean, secure, and fast images that are truly ready for any production system.
Dynamic Builds with ARGs and Platform Flags
While single and multi-stage builds get you far, sometimes you need your Dockerfiles to be more dynamic. This is where you can start injecting real flexibility right into the FROM instruction using build-time arguments (ARG) and specifying target architectures with the --platform flag.
These aren't just niche features; they're essential tools for building adaptable images that work seamlessly across different environments, a must-have in modern development workflows.
Using ARG for Flexible Base Images
Imagine your team wants to test an application against a few different Node.js patch versions, or maybe you use a full-featured base image for development but a stripped-down Alpine image for production. You could maintain separate Dockerfiles, but that quickly becomes a mess.
A much cleaner approach is to use ARG. By declaring an argument before the FROM line, you can pass its value in when you run the build command, effectively changing the base image on the fly.
Here’s a practical example using a Node.js app. We'll set a default base image but allow it to be easily overridden.
Declare a build argument with a default value.
This MUST come before the FROM instruction.
ARG BASE_VERSION=20-alpine
Use the argument in the FROM instruction.
FROM node:${BASE_VERSION}
WORKDIR /app
COPY package*.json ./
RUN npm install
COPY . .
CMD ["node", "server.js"]
If you build this with no extra flags, it defaults to using node:20-alpine. But let's say you want to build with the slim variant instead. You just pass a --build-arg:
docker build --build-arg BASE_VERSION=20-slim -t my-app:slim .
With that one command, you've created a different image variant without touching a single line of the Dockerfile. It’s an incredibly efficient way to manage builds for different stages, from testing to production.
To help you decide which base image is right for your needs, here's a quick comparison of the most common variants:
Base Image Comparison: Alpine vs. Slim vs. Full
| Image Variant | Typical Size | Pros | Cons |
|---|---|---|---|
| Alpine | ~5-10 MB | Extremely small, reduced attack surface. | Uses musl libc instead of glibc, which can cause compatibility issues. Lacks common tools. |
| Slim | ~50-100 MB | Good balance of size and features. Based on Debian, so it has glibc and standard tools. |
Larger than Alpine. Might still be missing some specific build dependencies you'd find in a full image. |
Full (e.g., latest, bookworm) |
~200-300+ MB | Comes with everything you could need, including build tools and common libraries. Great for debugging. | Very large, which means slower pulls/pushes and a larger potential attack surface. |
For production, Alpine is a fantastic choice if your application is compatible. If not, Slim offers a great middle ground. Reserve the full images for complex builds or local development where convenience outweighs size.
Cross-Architecture Builds with the Platform Flag
The ARG trick is great for software versions, but what about hardware? In many SaaS companies, developers are working on ARM-based machines (like Apple Silicon Macs) while production servers are running on x86-64 hardware in the cloud. This mismatch can cause major headaches.
The --platform flag solves this by letting you specify the target CPU architecture for your build. You can add it directly into your FROM instruction to ensure you're pulling the correct base image variant.
Pull a Python base image specifically for an x86 (amd64) server
FROM –platform=linux/amd64 python:3.11-slim
… rest of your Dockerfile
You can also set the platform for the entire build process via the command line:
docker build --platform linux/amd64 -t my-app:latest .
This tells Docker to execute the entire build for a linux/amd64 target, preventing architecture-specific binaries from sneaking into an image destined for a different system.
Real-World Impact: For our team, the
--platformflag was the final fix for the classic "it works on my machine" problem. Developers on M1 Macs were building images that would instantly crash on our x86 production servers. By standardizing our CI/CD pipeline to always build with--platform linux/amd64, we completely eliminated those architecture-mismatch errors.
Mastering these dynamic FROM features is a big step toward a truly professional CI/CD process. These practices are cornerstones of the strategies discussed in our deep-dive on implementing robust DevOps and continuous delivery.
Security and Optimization Best Practices
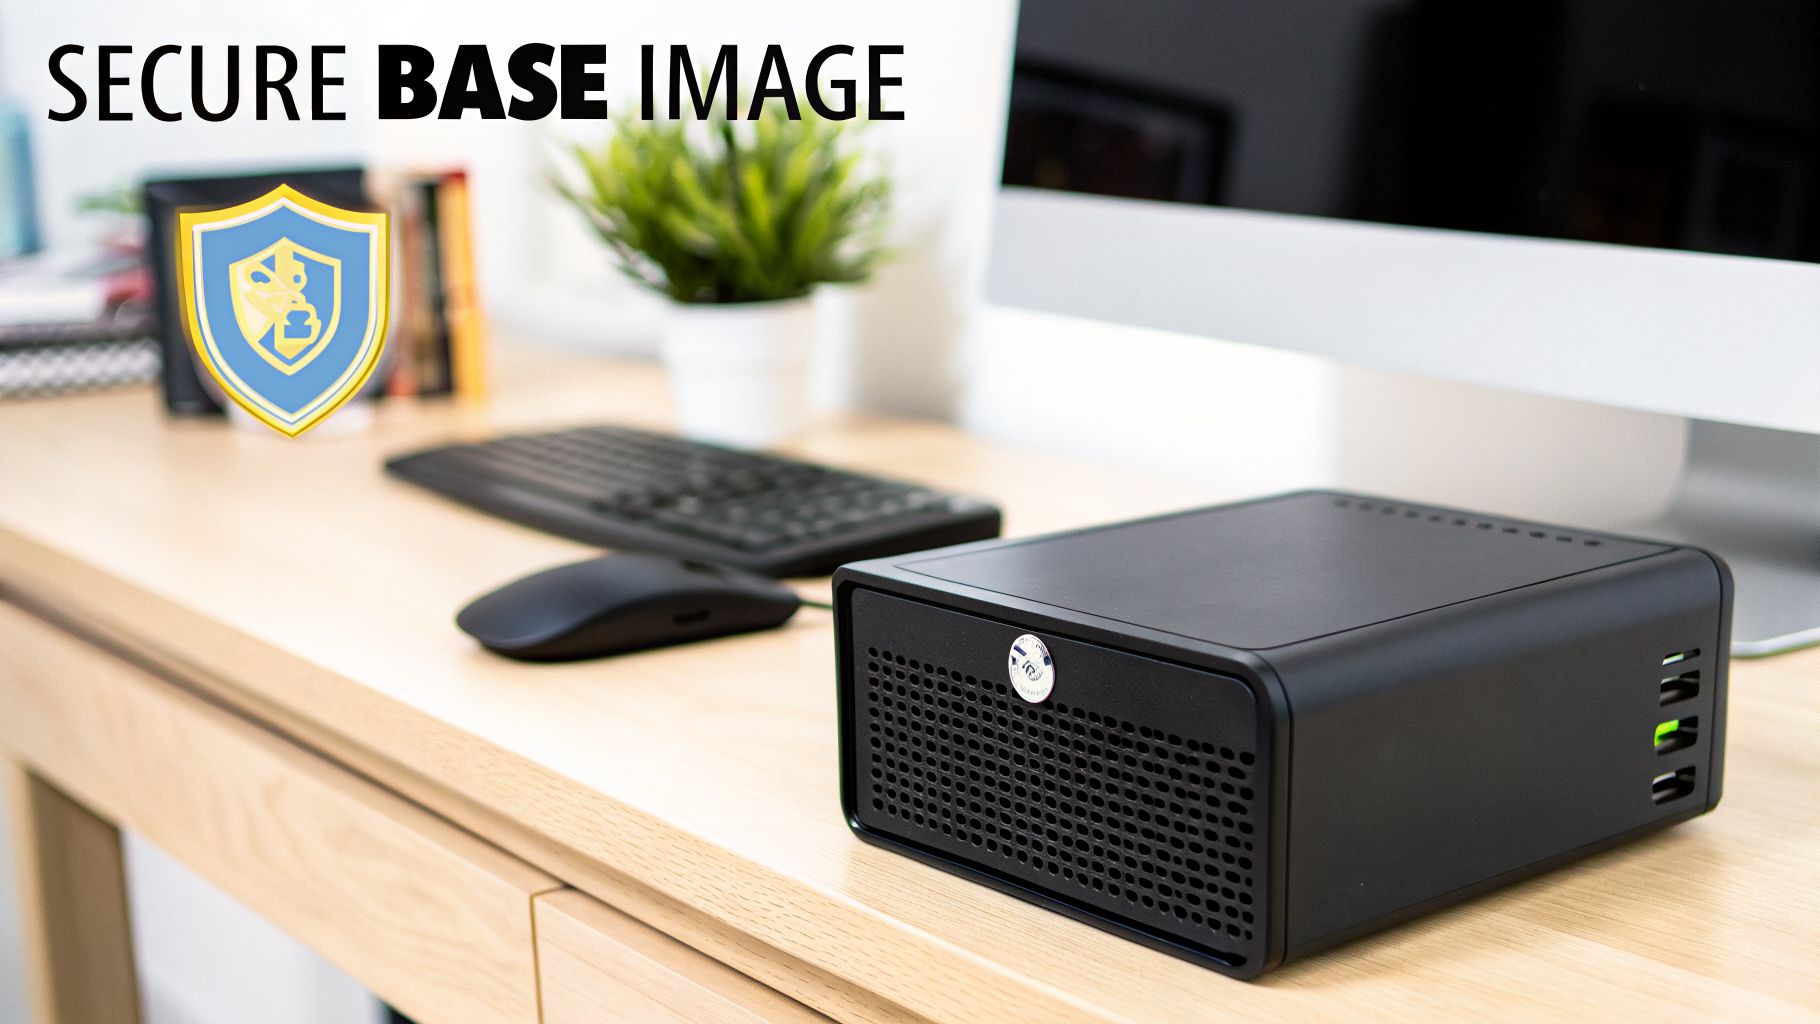
It’s easy to get caught up in optimizing for speed and size, but when you're choosing a base image with FROM, security has to be your top priority. A lean image is great, but a secure one is non-negotiable, especially in a B2B or SaaS environment where customer trust is everything. Your security posture literally starts with the very first line of your Dockerfile.
The golden rule here is to always use official images from a trusted source, like Docker Hub or your own company's private registry. Pulling a random image from an unverified publisher is the container equivalent of running an executable from a stranger's email—it’s a massive, unacceptable risk.
Pin Your Base Image Version
One of the most common—and dangerous—mistakes I see teams make is using the :latest tag in production. That tag is a moving target. The image it points to can change without warning, silently introducing breaking changes or, even worse, new vulnerabilities into your builds.
Never use
:latestin production. For builds to be predictable and reproducible, you have to pin your base image to a specific version. This is the only way to ensure every build uses the exact same foundation, preventing those "it worked on my machine" headaches in your CI/CD pipeline.
There are a couple of solid ways to lock this down:
- Specific Tags: This is a huge step up from
:latest. Using a precise version likeFROM python:3.11.9-slimgives you a great balance of control and readability. - SHA256 Digests: For absolute, undeniable certainty, pin the image to its content-addressable digest. It looks like this:
FROM python@sha256:d8a.... This guarantees you are using an immutable, bit-for-bit identical image every single time.
Minimize Your Attack Surface
Think of every package and library in your base image as a potential door for an attacker. Your goal should be to start with as few doors as possible. That means picking the smallest, most minimal base image that can still get the job done.
Images like Alpine Linux (-alpine) or Google's Distroless images are fantastic for this. They contain only the bare essentials needed to run an application, which dramatically reduces the potential attack surface. An image with fewer tools and libraries simply offers fewer things for an attacker to exploit.
Beyond just choosing a minimal image, you need to be scanning your images for known vulnerabilities. This isn't a "nice-to-have"; it's a critical, automated step in your CI process using tools like Docker Scout or Snyk. Integrating these Dockerfile habits with broader CI/CD pipeline best practices helps create a truly robust security strategy from end to end. As you get more serious about this, you'll also find that managing credentials and scan results requires a solid approach to DevOps secrets management.
Troubleshooting Common FROM Instruction Errors
We’ve all been there. You kick off a docker build, and it immediately fails with a cryptic error message. When you're dealing with the FROM instruction, these issues almost always pop up right at the start, bringing your entire build process to a halt.
Don't worry, though. Most of these problems are common and surprisingly easy to fix.
One of the most frequent errors you'll see is manifest for <image> not found or its close cousin, pull access denied for <image>, repository does not exist or may require 'docker login'.
When this message appears, it almost always boils down to one of three things:
- A simple typo in the image name or tag. It happens to the best of us.
- The image repository name is just plain wrong.
- The image lives in a private registry, and you haven't logged in yet.
Your first move should always be to double-check the spelling. If the image name and tag are correct, and you're trying to pull from a private registry like Docker Hub, Amazon ECR, or a self-hosted Artifactory, you just need to authenticate.
Pop open your terminal and run:
docker login my-private-registry.com
You'll get a prompt for your credentials. Once you're authenticated, Docker will have no problem pulling down the base image, and your build can proceed.
Diagnosing Architecture Mismatches
Another incredibly frustrating error is the infamous exec format error or a warning about an incompatible image architecture. This happens when the base image specified in your FROM line was built for a different CPU architecture than the machine you're building on.
For example, you might be working on a shiny new Apple Silicon (ARM64) Mac, but your FROM instruction is pulling a base image that was only ever built for traditional x86-64 servers. The moment your container tries to execute a binary compiled for the wrong CPU, it crashes.
My Personal Fix: I ran into this brick wall constantly when our team started adopting M1 Macs. The fix was to standardize our builds. Now, we explicitly set the target architecture in our CI/CD pipelines using the
--platformflag, like this:docker build --platform linux/amd64 -t my-app .. This forces Docker to build for our x86 production servers, no matter which developer's machine is running the build. That one change completely eliminated this entire class of errors for us.
Getting a handle on these common FROM instruction errors will help you diagnose and resolve build failures in minutes, not hours, leading to a much smoother and more predictable workflow.
At MakeAutomation, we specialize in refining technical workflows just like this. If you're looking to optimize your development and deployment processes, visit us at https://makeautomation.co to see how we can help you build more efficiently.