

Mastering Angular Unit Tests for Scalable SaaS Applications
Angular unit tests aren't just a box to check on your way to deployment. They are a fundamental part of building software that doesn't break in unexpected ways. By testing the smallest pieces of your code in isolation—a single component, a service, a pipe—you create a safety net that catches bugs early and lets you refactor with confidence.
Why Angular Unit Tests Are a Lifeline for Scalable SaaS
For any SaaS business that wants to grow, having a rock-solid testing strategy isn't just a nice-to-have; it's a competitive necessity. Think of Angular unit tests as your first line of defense. They stop tiny issues at the source before they can snowball into massive, customer-facing problems that cost you time, money, and reputation.
This disciplined approach pays dividends. When your developers trust the test suite, they can ship features faster. They can merge code without holding their breath. This speed and confidence in your development cycle are what separate fast-growing companies from the ones that get bogged down in technical debt.
Connecting Code Quality to Your Bottom Line
Let's get specific. Imagine a bug in your SaaS app's billing service that miscalculates charges. Or what if a new update breaks your user onboarding flow? These aren't just lines of code gone wrong—they are business emergencies that can cripple your cash flow and erode customer trust.
A solid foundation of unit tests is what stands between you and those scenarios. It’s about ensuring every individual part of your application works exactly as intended, all the time.
This is especially true in the demanding B2B SaaS world. In fact, industry data from 2026 shows a clear link: Angular apps with high unit test coverage report 40-50% fewer defects in production. That's a huge reduction in firefighting for your dev team, freeing them up to build new, value-adding features instead.
A rigorous testing culture doesn't slow you down—it lets you move faster and more predictably. By investing in unit tests, you're building a stable platform for growth, ensuring that your application can scale reliably as your user base and feature set expand.
To make sure your quality efforts are comprehensive, it helps to have a structured approach. Using an ultimate software testing checklist can help you cover all your bases, from unit tests to end-to-end validation. At the end of the day, it's all about building a product so reliable that it earns trust with every click, which is the true foundation of any successful SaaS business.
Getting Your Angular Testing Environment Right
A solid testing strategy starts with a well-oiled environment. The good news is that when you scaffold a new project with the Angular CLI, it gives you a complete setup for your Angular unit tests right out of the box. This default configuration pairs Karma as the test runner with Jasmine as the testing framework, providing a stable, battle-tested foundation to build upon.
Getting a handle on this initial setup is your first real step toward mastering Angular testing. The CLI drops in a couple of key files that orchestrate the whole process, and understanding what they do is essential.
The Default Karma and Jasmine Setup Explained
At the heart of the default environment are two files: karma.conf.js and test.ts. Think of karma.conf.js as the control center for your test runner. It tells Karma which browsers to fire up, what files to load, which reporters to use for things like code coverage, and how to bundle it all together.
Then you have test.ts, which serves as the main entry point for your tests. Its job is to initialize the Angular testing environment itself. This file sets up the TestBed, which is Angular's core utility for testing components, and then it goes on a hunt, dynamically finding all files in your project that end in .spec.ts so it can run them.
I like to think of
karma.conf.jsas the stage manager setting up the lights and sound, whiletest.tsis the director cuing the actors—your tests. When both are in sync, you get a flawless performance.
This classic Karma and Jasmine combo has been the standard for a long time and, frankly, it works great for many projects. But as applications grow—especially in a fast-paced SaaS environment—teams often start looking for ways to speed things up.
Why You Might Switch to Jest for Faster, Simpler Tests
While Karma is a workhorse, many developers I know have moved over to Jest for its raw speed and simplicity. Jest, which came out of Facebook, often runs tests dramatically faster by executing them in parallel. When you have a massive SaaS app with thousands of unit tests, this can slash your CI/CD pipeline time from several minutes down to just seconds.
Here’s why so many teams are making the switch:
- Everything in One Box: Jest is an all-in-one package. It comes with a test runner, an assertion library, and powerful mocking capabilities. This means less configuration juggling compared to managing Karma and Jasmine separately.
- Snapshot Testing: This is a killer feature for UI components. Jest can capture a "snapshot" of your component's rendered output. If the UI changes unexpectedly down the line, the test fails, saving you from visual regressions you might have missed.
- Better Mocking: Many developers find Jest's built-in mocking more intuitive and robust than Jasmine's spies. This makes it much easier to isolate your tests from their external dependencies.
With Karma now deprecated, the Angular team has started adding experimental support for modern runners like Vitest. This shift is a clear signal that the ecosystem is moving toward more performant tooling. Migrating to Jest involves ditching the Karma dependencies, installing the Jest packages, and creating a jest.config.js file. The process is well-documented, so it's a straightforward path to a much faster testing experience.
The business case for a robust testing environment is clear, leading to fewer bugs, faster development, and lower costs.
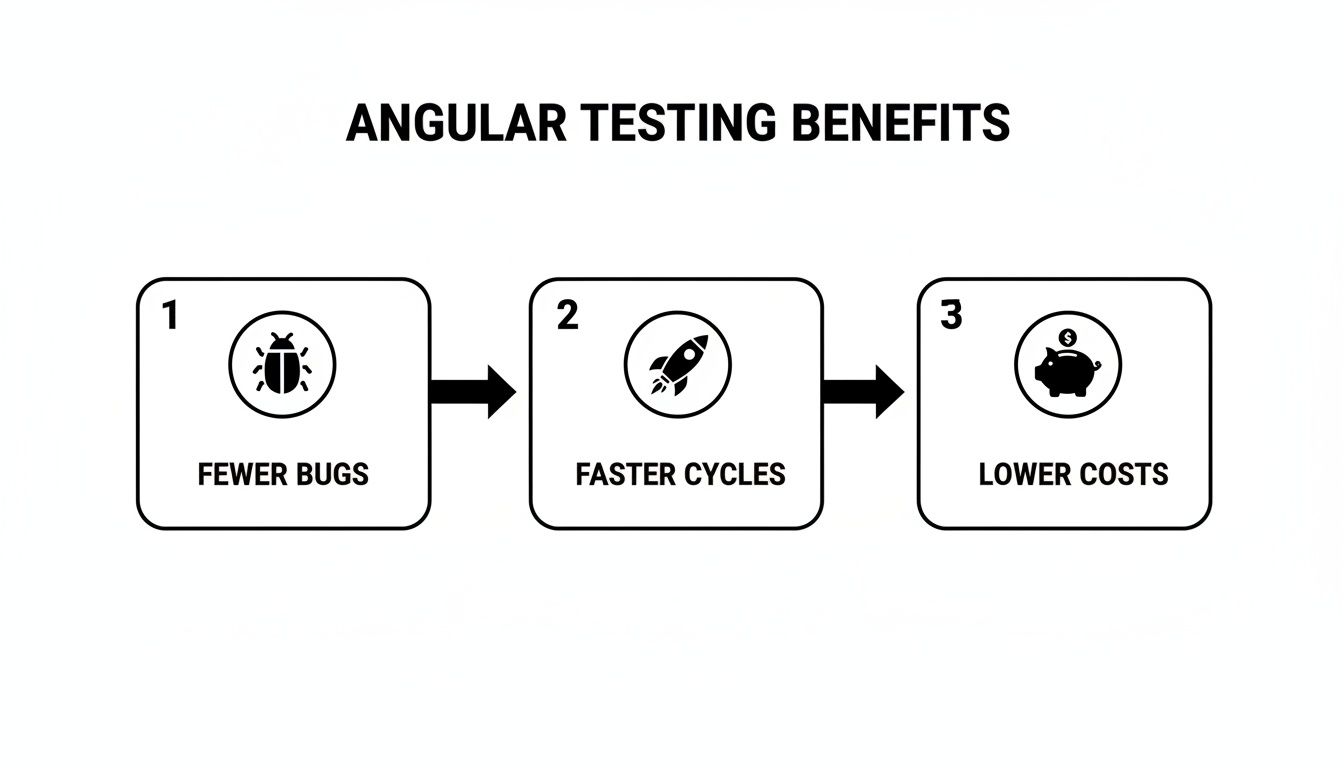
As this shows, putting in the effort to configure your testing setup properly has a direct and positive impact on your team's velocity and the quality of your product.
Setting Up for Continuous Integration
Remember, your testing environment isn't just for you and your laptop. The ultimate goal is to get it running automatically inside a CI/CD pipeline. This means your configuration has to support headless browser execution—running tests in a command-line environment without a visible browser window.
For a Karma setup, this means configuring a headless browser like ChromeHeadless. With Jest, you're already covered because its default test environment, jsdom, is headless by design. Getting this piece right is non-negotiable for real automation. To see how this fits into the larger deployment strategy, take a look at our guide on building an auto DevOps pipeline for a more complete picture.
Mastering Component Testing with TestBed

With your testing environment set up, we can get into the real work of Angular unit tests: tackling components with the TestBed. This is Angular's built-in testing utility, and you'll be spending a lot of time with it. Think of TestBed as a way to create a temporary, sandboxed Angular module just for your test. It gives you full control to mock dependencies and configure the component's world exactly how you need it.
The main function you'll use is TestBed.configureTestingModule(). This is where you'll define everything your component needs to function in isolation—mock services, dummy pipes, or even other components. A well-configured testing module is the key to a reliable, focused component test.
Performing Shallow Component Tests
A powerful strategy you should adopt early on is shallow testing. The idea is simple: instead of rendering your component and its entire tree of child components, you render it alone. You achieve this by including NO_ERRORS_SCHEMA in your testing module, which tells Angular to simply ignore any elements it doesn't recognize (like your child component selectors).
This approach has a couple of massive benefits:
- Isolation: Your test focuses only on the parent component's behavior. It won't fail just because someone changed the implementation of a child component.
- Speed: It's dramatically faster. You're not paying the performance price of creating and rendering a potentially complex tree of nested components.
For any team building a SaaS app, that efficiency is a huge win. We've seen shallow testing cut test setup times by up to 70% compared to full DOM rendering. This can give back 20-30% of your team's development time each week by catching bugs faster. You can find more practical advice on Angular development over at BootstrapDash.
Interacting with Your Component's DOM
Once TestBed is configured, you'll use TestBed.createComponent() to get an instance of your component. This doesn't just return the component itself; it gives you a ComponentFixture. The fixture is your handle for interacting with both the component instance and its rendered template. Through it, you can access the DebugElement, a wrapper around the component's native DOM element that gives you a rich API for querying and manipulation.
Let's walk through a classic example: a login form. We want to test that the submit button is disabled until a user has filled out both the email and password fields.
// Inside your test file (.spec.ts)
describe('LoginFormComponent', () => {
let fixture: ComponentFixture
let component: LoginFormComponent;
beforeEach(async () => {
await TestBed.configureTestingModule({
declarations: [LoginFormComponent],
imports: [ReactiveFormsModule] // Needed for form controls
}).compileComponents();
fixture = TestBed.createComponent(LoginFormComponent);
component = fixture.componentInstance;
fixture.detectChanges(); // Initial data binding
});
it('should have a disabled submit button initially', () => {
const submitButton = fixture.debugElement.query(By.css('button[type="submit"]'));
expect(submitButton.nativeElement.disabled).toBe(true);
});
});
Here, we use fixture.debugElement.query(By.css(...)) to grab the button from the rendered template. Then, we make a simple assertion: its disabled property should be true on first load. This is the bread and butter of angular unit tests for components.
Simulating User Events and Triggering Changes
Of course, testing the initial state is only half the battle. The real value comes from verifying how the component responds to user actions. The DebugElement makes it easy to simulate events like clicks or keyboard input.
Picking up with our login form, let's write a test that simulates a user filling out the form and then checks if the button becomes enabled.
it('should enable the submit button when the form is valid', () => {
// Arrange
const emailInput = fixture.debugElement.query(By.css('input[type="email"]'));
const passwordInput = fixture.debugElement.query(By.css('input[type="password"]'));
const submitButton = fixture.debugElement.query(By.css('button[type="submit"]'));
// Act
emailInput.nativeElement.value = 'test@example.com';
emailInput.nativeElement.dispatchEvent(new Event('input'));
passwordInput.nativeElement.value = 'password123';
passwordInput.nativeElement.dispatchEvent(new Event('input'));
fixture.detectChanges(); // Trigger change detection to update the view
// Assert
expect(submitButton.nativeElement.disabled).toBe(false);
});
Pay close attention to that fixture.detectChanges() call. It's absolutely critical. After you programmatically change an input's value or update a component property, you have to manually tell Angular to run its change detection cycle. This is what updates the template based on your changes.
Pro Tip: Forgetting to call
fixture.detectChanges()is probably the single most common mistake I see developers make when writing component tests. If your test is failing and you can't figure out why, double-check that you've triggered change detection after every action. It will save you hours of frustration.
Writing Bulletproof Tests for Services and Pipes

While components get all the glory, the real heavy lifting in your app happens in the services and pipes. This is where you'll find the core business logic, the data management, and the state transformations. If you want a stable application, writing solid Angular unit tests for these isn't just a good idea—it's essential. This is where your most complex and critical code lives.
The good news? Services are usually just plain TypeScript classes. This makes them a dream to test compared to components. You can often skip the TestBed setup entirely, simply new up an instance, and get straight to testing your logic. The result is lightning-fast, focused tests.
Isolating Services with Mock Dependencies
A service test is only as good as its isolation. In the real world, your services probably rely on other services, like Angular's HttpClient or your own AuthService. The goal of a unit test is to check your service's logic, not the logic of its dependencies.
That’s where mocking comes into play. By creating fakes for these dependencies, you gain complete control over the test environment. Using spies from Jasmine (spyOn) or Jest (vi.spyOn), you can dictate exactly how a dependency behaves. This lets you confidently test every scenario, from a perfect API response to a sudden network failure.
Imagine you have a DataService that logs its actions using a LoggingService. You'd simply create a mock LoggingService (using jasmine.createSpyObj or vi.fn) and pass it into the DataService constructor. Now, your test can verify with certainty that DataService called the logger's log() method exactly when and how it was supposed to.
Mocking HttpClient for API Interactions
One of the most frequent mocking scenarios you'll encounter is HttpClient. Almost every SaaS app needs to communicate with a backend API, but your unit tests should never make real network requests. That would make them slow, unreliable, and dependent on external systems.
Angular's HttpClientTestingModule and its sidekick, HttpTestingController, are built for this exact purpose. They create a mock backend that intercepts any outgoing HTTP calls. Your tests can then inspect those requests and "flush" back any response you want to simulate.
A typical workflow for testing a service that fetches data looks something like this:
- First, you pull
HttpClientTestingModuleinto yourTestBedconfiguration. - Then, you inject both your service-under-test and the
HttpTestingController. - Inside your test, you'll call the service method that's supposed to make the API call.
- Next, you use
httpTestingController.expectOne()to find the pending request and confirm it went to the right URL. - From there, you can
flush()a mock response (or an error) back to the service. - Finally, you assert that your service handled that data or error just as you expected.
This pattern is absolutely fundamental for building data-driven features. Once you get the hang of
HttpTestingController, you can easily simulate 404s, 500s, network timeouts, and other edge cases to make sure your services are truly resilient.
For startups building automation tools for things like CRM and lead generation, this level of testing isn't just academic—it's a competitive advantage. DevOps analyses for 2026 show that teams with strong automated unit testing see a 65% reduction in post-release bugs and can ship updates three times more frequently. If you're interested in the tooling that enables this, you can find great breakdowns from resources like DevOps School.
Testing the Logic of Angular Pipes
Let’s not forget about pipes. They're the small but mighty transformers that format data right in your templates. Like services, pipes are just simple classes with a single transform method. This makes them incredibly straightforward to test without any TestBed ceremony.
All you have to do is create an instance of the pipe and call its transform method with different inputs to verify the output. It's that simple.
For example, testing a custom truncate pipe would look clean and direct:
// Inside your pipe's .spec.ts file
import { TruncatePipe } from './truncate.pipe';
describe('TruncatePipe', () => {
const pipe = new TruncatePipe();
it('should truncate a long string', () => {
const result = pipe.transform('This is a very long string', 10);
expect(result).toBe('This is a…');
});
it('should not truncate a short string', () => {
const result = pipe.transform('Short', 10);
expect(result).toBe('Short');
});
});
Your goal here is to cover every logical path. Test it with normal data, edge cases, and empty or null values. Since pipes directly affect what the user sees, getting their output right is key to a polished UI. If you're building a lot of these tests, you might want to check out some pre-made unit test templates to help standardize your work and move faster.
Advanced Testing Techniques and Best Practices
So you've gotten the hang of testing components and services. That's a huge step. But to build a truly resilient SaaS application, your Angular unit tests need to move beyond the basics and handle the tricky stuff with confidence.
Mastering these more advanced techniques is what separates a decent test suite from a great one—one that's fast, reliable, and genuinely adds value. It all comes down to how you handle asynchronous code, optimize for speed, and stick to proven patterns. Let's dig into how you can level up your own testing game.
Conquering Asynchronous Operations
Modern web apps are built on asynchronous actions. Components fetch data, timers count down, animations play out. Your tests can't just ignore this; they have to control the flow of time to verify behavior that isn't instant. Both Jasmine and Jest give you some powerful tools for this.
In Angular, you’ll primarily lean on two strategies: waitForAsync and fakeAsync.
-
waitForAsync: This is a helper that wraps your test in a zone that simply waits for async tasks like Promises or Observables to finish. It’s a straightforward approach, but because it often relies on real-world time, it can make your tests slower. -
fakeAsync: This is the real game-changer.fakeAsyncputs your test inside a simulated time zone where you are the master of the clock. You can use functions liketick()to jump forward in time orflush()to clear out any pending tasks. This effectively makes your async tests behave synchronously, which means they run fast and are completely predictable.
In my experience,
fakeAsyncwithtick()is the superior choice for 90% of asynchronous testing. It gives you surgical precision, kills flaky tests caused by real-world timers, and runs worlds faster thanwaitForAsync.
Imagine you're testing a component that shows a "Loading…" message, fetches data, and then displays the result. With fakeAsync, you can call tick() to instantly simulate the API response delay and then immediately assert that the "Loading…" message is gone and the correct data is on screen. That level of control is invaluable.
Optimizing Your Test Suite for Performance
As your app scales, your test suite will inevitably grow with it. A slow test suite is a developer's worst enemy. If it takes 10 minutes to run, people will just stop running it locally, clogging up your CI/CD pipeline and slowing down the whole team.
Thankfully, there are concrete steps you can take to keep your Angular unit tests running lightning-fast.
- Embrace Standalone Components: By using standalone components, directives, and pipes, you can import only the specific dependencies a test needs. This avoids the overhead of compiling massive, unnecessary NgModules for every single test and dramatically shrinks your
TestBedconfiguration time. - Test Pure Pipes Separately: As we mentioned earlier, pure pipes are just simple classes with a
transformmethod. Test them that way—as a plain class, without involving theTestBedat all. This is orders of magnitude faster. - Mock, Don't Import: Get into the habit of mocking everything that isn't the direct subject of your test. Avoid importing other complex components or large services. Creating simple stubs keeps your tests isolated, focused, and incredibly fast.
Speaking of improving code, it’s impossible to ignore how modern tooling is changing the game. If you're looking for ways to boost code quality and development speed, exploring AI coding tools can be a huge help. They can assist with things like refactoring, generating test stubs, and spotting performance hogs, which lets your team focus on the hard problems.
Proven Best Practices for Bulletproof Tests
Finally, let’s lay down some ground rules. Following these best practices will make your tests more readable, easier to maintain, and far more trustworthy.
Adopt the Arrange-Act-Assert (AAA) Pattern
This simple structure should be the backbone of every single test you write. It makes the intent of the test crystal clear at a glance.
- Arrange: Set up your world. Instantiate the component, configure your mocks, and define any initial state needed.
- Act: Do the thing. This is the trigger—a button click, a method call, or an event firing.
- Assert: Check the result. Verify that the component's state or the rendered DOM changed exactly as you expected.
Write Focused, Non-Brittle Assertions
Each test should verify one logical concept. Don't cram assertions for five different things into a single it() block. Also, write your assertions to be resilient to small changes. For example, instead of expect(element.textContent).toBe('Welcome, John Doe!'), it's often better to use toContain('Welcome'). This prevents a minor copy edit from breaking your entire test suite.
Integrate into a CI/CD Pipeline
Tests deliver the most value when they run automatically on every single commit. Integrating your test suite into a CI server like GitHub Actions, GitLab CI, or Jenkins is simply non-negotiable for a professional team. This creates an automated quality gate that stops bugs from ever making it to production. Unit tests are the foundation, but a robust pipeline includes more. To see what comes next, our guide on Cypress integration tests provides a good look at that next layer of automated testing.
Frequently Asked Questions About Angular Unit Tests
As you get your hands dirty with Angular unit testing, you're going to run into some common questions. It happens to everyone. These are the topics that trip up developers time and time again.
This section is your quick reference for those exact moments. Think of it as a conversation with a senior dev, getting straight-to-the-point answers to help you get unstuck and write better tests.
How Do I Choose Between Karma and Jest for My Angular Project?
This used to be a real debate, but honestly, the community has made the decision for us. While Karma (with Jasmine) was the default for years, it's now officially deprecated. For any new project in 2026, the clear winner is Jest.
If you're still weighing your options or considering a migration, here’s the breakdown:
-
Karma (+ Jasmine): The classic. It was built for browsers and integrated well with the Angular CLI out of the box. The biggest downsides have always been its slower performance on larger projects and the sometimes clunky configuration.
-
Jest: This is the modern standard. It’s a complete testing framework that packs a test runner, assertion library, and fantastic mocking capabilities into one package. The main draw is performance. Jest's parallel test execution is a game-changer for big SaaS apps, often slashing the time your tests take to run in a CI pipeline.
For any new project, start with Jest. If you're on an older project still using Karma, I’d strongly recommend putting a migration to Jest on your roadmap. The performance boost alone is worth the effort, especially as your codebase grows.
What Is the Difference Between a Unit Test and an Integration Test?
Getting this distinction right is crucial because it shapes your entire testing strategy. They aren't interchangeable; they test different things at different scopes.
null
null
Let's put that into a real-world context for an Angular app.
A unit test would check a single function on your AuthService to make sure it correctly formats an API request payload. You'd mock HttpClient entirely and just focus on the service's own logic.
An integration test, on the other hand, might test the full login flow. You’d check that when a user fills out the LoginComponent, clicks the "Submit" button, the component correctly calls the AuthService, which then (using a mocked backend response) updates the application state and navigates the user to the dashboard. You're testing how the pieces work together.
How Much Code Coverage Should I Aim For?
This is the million-dollar question, and the answer isn't "100%." Chasing a perfect score often leads to writing brittle, low-value tests just to make a number go up. It becomes a vanity metric, not a measure of quality.
A much healthier and more effective target for most production applications is 80-90% coverage.
The real key is to focus on what that percentage represents. Your most critical business logic—the complex calculations, the state management, the authentication flows—should be as close to 100% covered as possible. Less critical UI components might be lower.
Use your coverage reports as a map to find completely untested areas of your app. Don't obsess over getting from 85% to 86%. Instead, worry about the files sitting at 0%. Your goal is confidence, not a perfect score.
At MakeAutomation, we specialize in helping businesses build scalable, efficient systems. Whether you're refining your development workflows or implementing AI-driven processes, our expertise can help you eliminate bottlenecks and accelerate your growth. Find out how we can help you optimize your operations at https://makeautomation.co.