Discover docker on aws lambda: Build and Run Containerized Serverless Apps
Pairing Docker on AWS Lambda is a fantastic way to package up your applications and all their dependencies into a container image, then run them in a serverless setup. This approach gives you the best of both worlds: Docker's portability and the automatic scaling and pay-as-you-go pricing of AWS Lambda. It's especially useful for applications that have a lot of complex dependencies.
Why Use Docker Containers with AWS Lambda?
Deploying applications with lots of moving parts has always been a bit of a headache in serverless environments, especially for modern SaaS companies. For years, the go-to method was packaging everything into .zip archives, but the tight size limits were a real roadblock for anything data-heavy or AI-related. Bringing Docker into the AWS Lambda ecosystem was a direct answer to this problem.
This combination creates a powerful synergy. On one hand, you stick with the familiar, self-contained workflow of Docker. You can bundle your entire application—code, specific libraries, custom runtimes, and even large machine learning models—into a single, clean image. For teams already using containers, this is a huge win.
On the other hand, you still get all the perks of serverless computing. You don't have to worry about provisioning or managing servers, and you only pay for the exact compute time you use. It's the perfect bridge between the structured world of container development and the hands-off efficiency of event-driven functions. To really get a handle on this model, it helps to understand the core concepts of serverless architecture.
The Best of Both Worlds
The move to use Docker on AWS Lambda isn't just a niche trick; it's a major shift in how developers are building applications. A 2020 report from Datadog was eye-opening, showing that nearly 80% of organizations running containers on AWS had also adopted Lambda. AWS clearly saw this trend.
In response, they enabled Lambda functions to run directly from container images up to 10 GB in size. This was a massive jump from the old 250 MB (unzipped) limit for .zip files and completely changed the game. Suddenly, you could easily run functions with hefty libraries like NumPy or PyTorch, which are critical for many modern automation and data science tasks.
To give you a clearer picture, here's a quick comparison of the two deployment methods.
Lambda Deployment Methods At a Glance
| Feature | .zip Archive | Container Image |
|---|---|---|
| Max Package Size | 250 MB (unzipped) | 10 GB |
| Development Workflow | Package code and dependencies into a .zip file. | Build a standard Docker image. |
| Dependency Management | Can be complex; requires bundling all libraries. | Simplified; managed by the Dockerfile. |
| Best For | Simple functions with minimal dependencies. | Complex applications, ML models, custom runtimes. |
| Local Testing | Requires specific tools like SAM CLI. | Standard docker run commands. |
As you can see, container images offer far more flexibility for today's demanding applications.
Key Takeaway: Combining Docker with AWS Lambda gives you a perfect middle ground. You get the consistent packaging of containers without the headache of managing servers. It’s an ideal setup for complex tasks that need to run in a scalable and cost-effective way.
For businesses, this translates directly to faster development and lower infrastructure costs. Developers get to work in isolated, predictable environments, and the company benefits from a pure pay-per-use model. This powerful combination is a key part of modern cloud automation strategies, allowing teams to build more sophisticated and scalable applications.
Building Your First Lambda-Compatible Docker Image
Alright, enough with the theory. Let's get our hands dirty and build a real-world Docker image for AWS Lambda. Instead of a boring "hello world" function, we'll create something more practical: a Python function that handles new user signups for a SaaS application. Think of it as the first step in an onboarding workflow—it takes the user's data, maybe enriches it, and logs it for another service to pick up.
The heart of this entire process is the Dockerfile. If you're new to Docker, think of a Dockerfile as a recipe. It gives Docker a step-by-step list of instructions on how to assemble your container image—from the base operating system to your code and all its dependencies.
The key thing to remember is that you can't just use any Dockerfile. For a Lambda container, you have to start with a special base image provided by AWS. These images come pre-loaded with everything the Lambda service needs to talk to your code inside the container.
Structuring the Dockerfile
Let's start with a simple Dockerfile. The very first line is the most important one, as it sets the foundation for everything else. We'll use the official AWS base image for Python 3.12, which is built on the lightweight Amazon Linux 2023 OS.
Start from the official AWS Lambda Python base image
FROM public.ecr.aws/lambda/python:3.12
Copy the requirements file into the container
COPY requirements.txt .
Install the Python dependencies
RUN pip install -r requirements.txt
Copy the function code into the container
COPY app.py ${LAMBDA_TASK_ROOT}
Set the command to run when the container starts
CMD [ "app.handler" ]
See how straightforward that is? We pull the base image, copy over our requirements.txt file, run pip to install the libraries, and then copy our actual function code (app.py). Finally, the CMD instruction tells Lambda what to execute. The ${LAMBDA_TASK_ROOT} is just a handy environment variable AWS provides, making sure our code ends up in the right spot.
Implementing the Lambda Handler
Now for the Python code itself. The great thing about using containers is that your handler code in app.py looks almost exactly like it would in a regular zip-based Lambda. It's just a function that takes an event and context object. The event is where you'll find the payload from whatever triggered the function—in our case, the new user's information.
Here’s what our simple user signup handler looks like:
app.py
import json
import logging
Configure basic logging
logger = logging.getLogger()
logger.setLevel(logging.INFO)
def handler(event, context):
"""
Processes a new user signup event.
"""
logger.info("New signup event received!")
logger.info(f"Event payload: {json.dumps(event)}")
# Example: Extract user details from the event
user_email = event.get("email")
user_id = event.get("userId")

if not user_email or not user_id:
    logger.error("Missing user email or ID in the event.")
    return {
        "statusCode": 400,
        "body": json.dumps({"message": "Invalid user data"})
    }

# Simulate processing, like adding the user to a welcome email sequence
logger.info(f"Processing signup for user {user_id} with email {user_email}.")

# Return a success response
return {
    "statusCode": 200,
    "body": json.dumps({"message": f"Successfully processed signup for {user_email}"})
}
This handler logs the incoming data, does a quick check for an email and user ID, and then simulates some business logic. Put this code together with the Dockerfile, and you've got a complete, self-contained package ready for deployment.
The magic that makes all of this work seamlessly is the Lambda Runtime Interface Client (RIC). It's a tiny bit of software that AWS bakes into its base images. The RIC acts as a bridge, translating Lambda invocation events into simple HTTP requests that your code can easily handle. You don't see it, but it's what makes the container approach feel so natural.
Optimizing with Multi-Stage Builds
Our first Dockerfile works, but it's far from perfect. It leaves behind build tools like pip and other temporary files from the installation process. All that extra stuff bloats the final image size, which can mean slightly slower cold starts and higher storage costs in Amazon ECR.
The professional way to handle this is with a multi-stage build. This is a powerful Docker feature that lets you define multiple stages in a single Dockerfile. You can use one "builder" stage to compile code or install dependencies, and then a second, clean "final" stage to copy over only the artifacts you actually need.
Let's refactor our Dockerfile to use this technique:
Stage 1: Build stage
FROM public.ecr.aws/lambda/python:3.12 as builder
Create a directory for dependencies
WORKDIR /deps
COPY requirements.txt .
RUN pip install -r requirements.txt -t .
Stage 2: Final runtime stage
FROM public.ecr.aws/lambda/python:3.12
Copy dependencies from the builder stage
COPY –from=builder /deps ${LAMBDA_TASK_ROOT}
Copy the function code
COPY app.py ${LAMBDA_TASK_ROOT}
Set the handler command
CMD [ "app.handler" ]
Notice the as builder alias in the first FROM line. We use that stage to install our dependencies into a dedicated /deps folder. Then, we start fresh with a new FROM line and use COPY --from=builder to pull only the installed libraries into our final image.
Everything from the builder stage is discarded. The result is a much leaner, more secure image. This is a best practice I recommend you adopt from day one—it will save you headaches down the road.
From Local Build to Live on Lambda: Using ECR
Alright, you've got a lean, mean, locally-tested Docker image. What's next? We need to get it into the AWS cloud so Lambda can actually use it. This is where Amazon Elastic Container Registry (ECR) enters the picture.
Think of ECR as your own private, highly secure Docker Hub, living right inside your AWS account. It’s the staging ground for all your container images before they get deployed.
Before you can push your image, you need a repository to hold it. This is a simple, one-time setup for each service or application you build. You can click around in the AWS Management Console, but I always recommend using the AWS CLI. It's faster, scriptable, and much easier to integrate into an automated workflow later on.
Setting Up Your ECR Repository
First things first, make sure your AWS CLI is configured with permissions to manage ECR. Once that's handled, creating the repository is just a single command. Let's say we're building a user-signup-service.
aws ecr create-repository
–repository-name user-signup-service
–region us-east-1
Running this creates a new private repository in the us-east-1 region. The command line will spit back a JSON object with all the details, including the repository's URI. Hang onto that URI—it's the full address you'll need to tag and push your image.
A Pro Tip from Experience: When creating your repository, I strongly suggest enabling "Tag immutability." This feature prevents you from accidentally overwriting an image tag (like
latest), which can save you from absolute chaos in production. It forces you to use unique tags for every new build, which is a solid best practice for keeping your versions straight.
With the repository ready, the process boils down to three quick steps: authenticate, tag, and push.
Pushing Your Image to the Registry
To start, you have to get your local Docker client to talk to your private ECR registry. The AWS CLI has a fantastic command that fetches a temporary authentication token and logs you in automatically.
Next, you need to tag your local image with the full ECR repository URI. This is how Docker knows exactly where to send the image. After that, it's a simple docker push.
Here’s how that sequence looks in the terminal:
Authenticate Docker with ECR: This command fetches credentials and securely pipes them to the Docker login.
aws ecr get-login-password --region us-east-1 | docker login --username AWS --password-stdin <your-aws-account-id>.dkr.ecr.us-east-1.amazonaws.comTag Your Local Image: Remember to swap
<your-aws-account-id>with your actual AWS account ID. Here, we're tagging our localuser-signup-service:latestimage.docker tag user-signup-service:latest <your-aws-account-id>.dkr.ecr.us-east-1.amazonaws.com/user-signup-service:latestPush the Image: This is the final step that uploads your tagged image from your machine into your private ECR repo.
docker push <your-aws-account-id>.dkr.ecr.us-east-1.amazonaws.com/user-signup-service:latest
Once that push is complete, your container image is officially living in AWS, ready to be picked up by Lambda.
The entire process, from code to a runnable image, is pretty straightforward when you break it down.
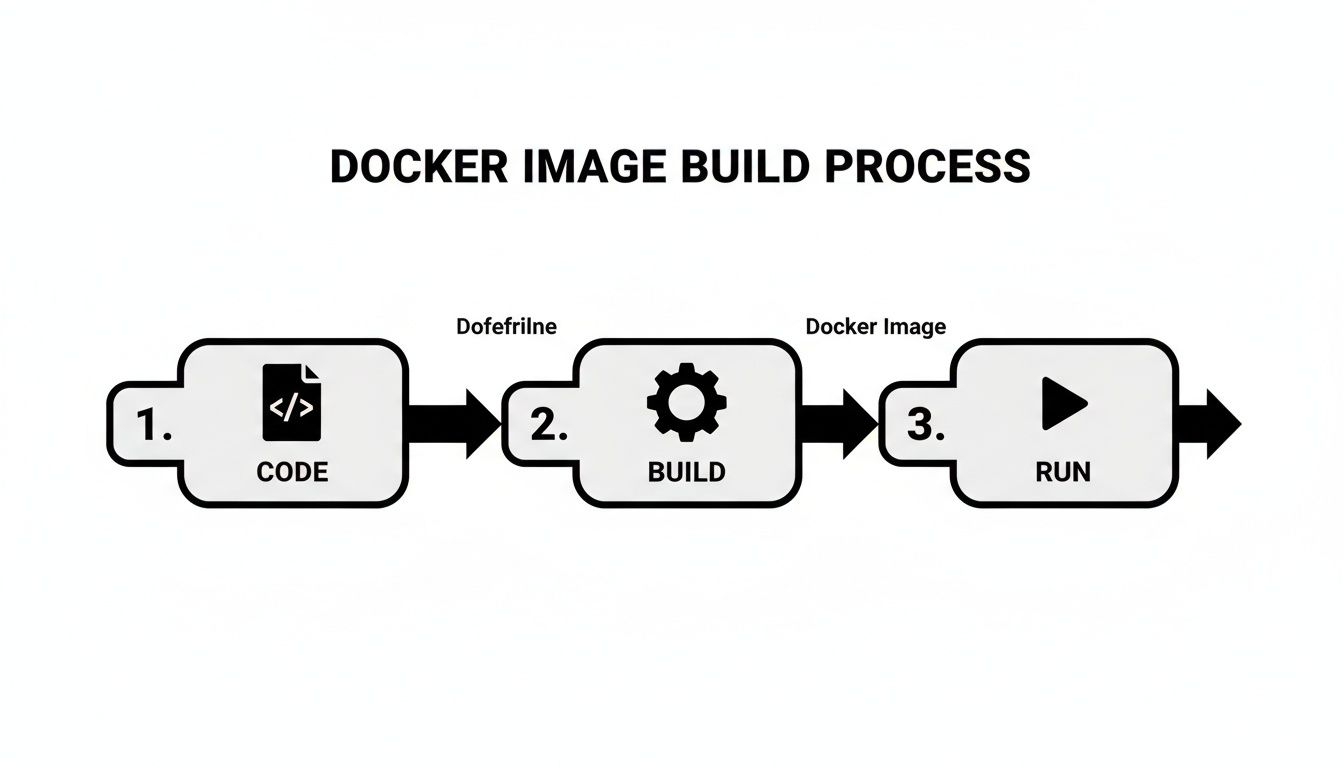
This visual shows the fundamental flow: you write the code, use a Dockerfile to build it into an image, and then run it. For us, that "run" step is deploying it on Lambda.
Creating the Lambda Function
Now for the magic. Head over to the AWS Lambda console and start creating a new function. This time, instead of the usual "Author from scratch," you're going to select the "Container image" option.
Give your function a memorable name, then hit the "Browse images" button. A window will pop up showing your ECR repositories. Find the user-signup-service repository and select the latest tag you just pushed.
You'll still need to configure the standard Lambda settings:
- Architecture: Pick between
x86_64andarm64(Graviton2). - Memory: Decide how much RAM your function gets. A good starting point is often 512 MB—you can always tune it later based on actual usage metrics.
- Timeout: Set the max execution time before your function is terminated.
- Execution Role: Assign an IAM role that grants your function the permissions it needs, like writing to CloudWatch Logs.
After you've got everything configured, just click "Create function." AWS takes over from here, pulling your container image from ECR and deploying it as a brand-new Lambda function. In just a few minutes, your Docker on AWS Lambda service will be live and ready for action.
Optimizing Performance, Cost, and Security
Getting your Docker on AWS Lambda function up and running is just the beginning. The real art is in making it fast, cost-effective, and secure. Let’s be honest, running containers efficiently on Lambda requires a different way of thinking than you might be used to with simple zip-based functions.
Every decision you make—from the CPU architecture to your base image—has a direct impact on your application's responsiveness and your monthly AWS bill. For anyone running data-heavy tasks or high-volume automations, those small inefficiencies can balloon into major costs pretty quickly. Our goal isn't just to build something that works, but something that works smart.
Here are the key areas I always focus on to tune containerized functions for peak performance and ironclad security.
H3: Choosing Between x86 and ARM (Graviton2)
One of the first, and most significant, choices you'll face is the processor architecture for your function. AWS Lambda offers two options: the traditional x86_64 and the AWS-built arm64 (Graviton2). While x86 is the old standby that everyone knows, you should seriously consider Graviton2. The financial upside can be huge.
I've found that for many workloads—especially anything doing heavy computation, data processing, or even image manipulation—Graviton2 often delivers far better price-performance. Put simply, you get more bang for your buck.
Let's look at the key differences between these two architectures when it comes to Lambda container functions.
Lambda Architecture Performance and Cost Comparison
| Metric | x86 Architecture | ARM (Graviton2) Architecture |
|---|---|---|
| Cost | Standard pricing. | Typically up to 20% lower cost for the same performance. |
| Performance | Established and widely supported. | Often provides better performance for compute-intensive tasks. |
| Compatibility | Near-universal support for libraries and packages. | Requires ARM-compatible binaries and dependencies. Support is growing rapidly. |
| Best For | General-purpose workloads and legacy applications where ARM compatibility is a concern. | New applications, compute-heavy jobs, and cost-sensitive projects. |
The move to ARM isn't just a theoretical benefit; it's a proven strategy for cutting costs without sacrificing speed. While you do need to ensure your Docker image and all its dependencies are built for the arm64 architecture, the effort is usually minimal for the significant savings you'll see.
H3: Fine-Tuning Your Docker Image Size
We've already talked about multi-stage builds, but I can't stress their importance enough for performance. A smaller Docker image is a faster Docker image. Period. When a cold start happens, Lambda has to pull your container image from ECR. It’s simple physics: a 1 GB image will always take longer to download and launch than a 100 MB one.
Here are some practical tips I use to slim down my images:
- Start with a Slim Base: Always go for the leanest base image possible, like
python:3.12-slimor a Distroless image if your app can handle it. The default AWS base images are a good start, but always ask yourself if you really need everything they bundle. - Clean Up Aggressively: In your
Dockerfile, chain yourRUNcommands with&&to create fewer layers. And crucially, always clean up package manager caches in the same layer you install packages. Forapt-get, that looks likeRUN apt-get update && apt-get install -y my-package && rm -rf /var/lib/apt/lists/*. - Analyze Your Layers: Use a tool like Dive to inspect your Docker image layer by layer. You'll be surprised what you find—large files or build artifacts that have no business being in your final image.
My Two Cents: Treat your Docker image like a backpack you have to carry on a long hike. Every ounce matters. Be ruthless in removing anything that isn't absolutely critical for runtime. This discipline pays off in lower cold start times and reduced ECR storage costs.
H3: Securing Functions with a VPC
If your function handles any kind of sensitive data—customer info, financial records, internal secrets—running it in a public space is simply not an option. This is where connecting your function to a Virtual Private Cloud (VPC) becomes essential.
A VPC is your own private, isolated corner of the AWS cloud. By launching your Lambda function inside a VPC, you gain complete control. You can:
- Lock Down Traffic: Use security groups and network access control lists (NACLs) to create strict firewall rules for what can talk to your function.
- Access Private Resources Securely: Connect to things like a private RDS database or an internal microservice without ever exposing them to the public internet.
This isn't just a "nice-to-have"; it's a standard practice for secure cloud design. In fact, a recent study showed that 65% of all Lambda users now connect their functions to a VPC, which tells you how critical it is. While setting it up correctly is vital to avoid performance snags, the security it provides is invaluable. This approach is a key part of any modern DevOps life cycle.
Automating Deployments with a CI/CD Pipeline
Let's be honest: manual deployments are a recipe for disaster. They're slow, riddled with potential for human error, and a major bottleneck that keeps your team from shipping code fast. For any serious SaaS or B2B company, a CI/CD (Continuous Integration and Continuous Deployment) pipeline isn't a "nice-to-have"—it's a core requirement for scaling your operations.
When you automate this workflow, you create a consistent, reliable path from a developer's machine to production. For your Docker on AWS Lambda functions, this means developers can focus on what really matters—building incredible features—instead of getting bogged down in deployment chores.
Adopting Automation for Containerized Lambdas
The game really changed in 2020 when AWS rolled out container image support for Lambda. This was a huge deal because it let teams bring their existing Docker expertise and workflows directly into the serverless ecosystem, which is a perfect fit for CI/CD automation.
And the numbers back this up. By 2022, a full 26% of serverless organizations on AWS were already running managed container workloads like containerized Lambdas. That's a 30% jump in just one year. You can read the full story on the AWS serverless anniversary page to see just how fast this trend has grown. It's clear the industry is moving toward more mature, automated deployment strategies.
With that in mind, let’s walk through building a practical CI/CD pipeline from the ground up to automate our own deployments.
Designing a Workflow with GitHub Actions
One of the most straightforward ways to get started is with GitHub Actions. It's built right into your repository, so there's no need to manage a separate CI/CD server. We're going to set up a workflow that automatically kicks off every time code is pushed to the main branch.
Our pipeline will handle a few key steps in order:
- Check out the code: First, it grabs the latest version from your repository.
- Configure AWS credentials: It securely authenticates with your AWS account to get access to services like ECR and Lambda.
- Log in to ECR: It connects Docker to your private Amazon Elastic Container Registry.
- Build, tag, and push the image: The workflow then builds your Docker image, tags it uniquely (we'll use the Git commit hash), and pushes the final image to your ECR repository.
- Update the Lambda function: As the final step, it instructs AWS Lambda to pull and deploy the new container image.
All of this logic is defined in a single YAML file that lives in a .github/workflows folder right alongside your code.
By automating this entire chain of events, you create a system where a
git pushis all that's needed to safely deploy an update. This dramatically reduces the "time-to-market" for new features and bug fixes, a crucial metric for any competitive business.
A Practical Pipeline Configuration
Here's a complete main.yml file you can use for your GitHub Actions workflow. This example assumes you've already set up an ECR repository named user-signup-service and a Lambda with the same name. You will also need to store your AWS credentials as secrets in your GitHub repository's settings.
name: Deploy Docker Image to Lambda
on:
push:
branches:
– main
env:
AWS_REGION: "us-east-1"
ECR_REPOSITORY: "user-signup-service"
LAMBDA_FUNCTION_NAME: "user-signup-service"
jobs:
deploy:
name: Build, Push, and Deploy
runs-on: ubuntu-latest
steps:
- name: Checkout repository
  uses: actions/checkout@v3

- name: Configure AWS credentials
  uses: aws-actions/configure-aws-credentials@v2
  with:
    aws-access-key-id: ${{ secrets.AWS_ACCESS_KEY_ID }}
    aws-secret-access-key: ${{ secrets.AWS_SECRET_ACCESS_KEY }}
    aws-region: ${{ env.AWS_REGION }}

- name: Login to Amazon ECR
  id: login-ecr
  uses: aws-actions/amazon-ecr-login@v1

- name: Build, tag, and push image to Amazon ECR
  id: build-image
  env:
    ECR_REGISTRY: ${{ steps.login-ecr.outputs.registry }}
    IMAGE_TAG: ${{ github.sha }}
  run: |
    docker build -t $ECR_REGISTRY/$ECR_REPOSITORY:$IMAGE_TAG .
    docker push $ECR_REGISTRY/$ECR_REPOSITORY:$IMAGE_TAG
    echo "image=$ECR_REGISTRY/$ECR_REPOSITORY:$IMAGE_TAG" >> $GITHUB_OUTPUT

- name: Update Lambda function
  run: |
    aws lambda update-function-code \
      --function-name ${{ env.LAMBDA_FUNCTION_NAME }} \
      --image-uri ${{ steps.build-image.outputs.image }}
This workflow is the backbone of reliable continuous delivery. It creates a transparent and repeatable process for getting your code from a developer's laptop into production. For a deeper look at the principles behind this, check out our guide on DevOps and continuous delivery. Putting a pipeline like this in place is a massive step forward in achieving operational excellence.
Knowing how to use Docker with AWS Lambda is only half the battle. The real trick is knowing when it's the right tool for the job. This approach isn't a one-size-fits-all solution, but for certain problems, it unlocks a ton of power and can be a remarkably cost-effective way to handle complex serverless tasks.
Essentially, containerized Lambdas really start to shine when your application's complexity grows. The ability to package large, custom runtimes and dependencies is where this method truly pulls ahead.
Ideal Scenarios for Containerized Lambdas
This approach is a lifesaver in situations where the standard .zip deployment method just can't keep up. That generous 10 GB container image limit is a complete game-changer for applications that rely on heavy dependencies.
Here are a few real-world examples where I've seen this work beautifully:
- Complex Data Processing: Imagine needing to generate detailed monthly reports for thousands of clients. These jobs often require hefty libraries like Pandas, NumPy, or specific data connectors that would blow past the old 250 MB .zip limit in a heartbeat.
- AI and Machine Learning Workflows: If you're running inference with a large machine learning model—say, for image recognition or natural language processing—containers are pretty much the only practical way to get it done on Lambda.
- Backend Microservices for SaaS: Building a SaaS platform? You can package a specific microservice, complete with its unique runtime and dependencies, into its own container. This makes for a clean separation of concerns and lets you update individual services without touching anything else.
- Legacy Application Migration: Got an older application already running in a container? You can often lift and shift it over to Lambda with surprisingly few code changes. This is a great way to get serverless benefits like auto-scaling and pay-per-use without a painful, ground-up rewrite.
Knowing When to Choose an Alternative
On the other hand, reaching for Docker on every single Lambda function is usually overkill. It can introduce a bit of extra complexity and potentially add a slight delay to cold starts. Being honest about the trade-offs will help you make much better architectural decisions down the road.
For simple, single-purpose functions with few or no external dependencies, a classic .zip deployment is almost always faster, cheaper, and easier to manage. If your function just needs to read from a queue and write to a database, stick with the simpler method.
You also have to remember that Lambda itself has limits. If your application needs to run continuously or requires more than 15 minutes of execution time, you've probably outgrown Lambda, and it's time to look at other AWS services.
- AWS Fargate: This is your go-to when you need to run long-running tasks or entire applications with multiple containers (like a web server and a worker) that need to be in constant communication. Fargate is built for those more traditional, always-on container workloads.
- AWS App Runner: Think about App Runner for web applications and APIs where you want the simplest possible deployment experience. It's fully managed and abstracts away even more of the infrastructure than Fargate, making it perfect when you just want to get your code running without fuss.
Your AWS Lambda Container Questions, Answered
When you start pairing Docker with AWS Lambda, a few questions always pop up. It's a powerful combination, but it works a bit differently than traditional zip-based deployments. Let's walk through some of the most common things we get asked by teams making the switch.
What's the Real-World Limit on Container Image Size?
Technically, you can deploy container images up to 10 GB. That’s a huge jump from the 250 MB (unzipped) limit for standard .zip deployments.
This massive capacity is precisely why this feature is so valuable. It opens the door for packaging functions with heavy dependencies, custom runtimes, and even large machine learning models that just wouldn't fit into a zip archive.
Are Cold Starts Worse with Containers?
They can be, but it’s manageable. A cold start for a container image can sometimes be a bit slower than for a .zip archive. This happens because AWS has a couple of extra steps: it needs to pull your image from the Amazon Elastic Container Registry (ECR) and then spin up the container environment before your code finally runs.
Our Take: In practice, you can almost completely erase this difference. The key is to keep your images lean. By using small base images, implementing multi-stage builds, and avoiding unnecessary files, you can significantly speed things up. If a function is so critical that even a slight delay is unacceptable, simply turn on Provisioned Concurrency. This keeps your function warm and guarantees it’s ready to go instantly.
Can I Just Use Docker Compose?
Unfortunately, no. You can't use Docker Compose directly with AWS Lambda. Lambda’s entire model is built around running a single container to handle a single event. It’s an event-driven compute service, not a container orchestrator.
Docker Compose, on the other hand, is designed for defining and running multi-container applications where services need to run and talk to each other. If that describes your architecture, you'd be much better off looking at a service like AWS Fargate, which is built for that exact purpose.
Ready to stop wrestling with manual processes and start scaling your operations? MakeAutomation specializes in implementing powerful AI and automation frameworks that eliminate costly workflows. Book a consultation today to see how we can help you reclaim time and boost your ROI.