Mastering Docker AWS Deploy for Scalable Cloud Apps
So, what does it really mean to docker aws deploy an application? In simple terms, you're packaging your app and all its dependencies into a portable Docker container, then running it on Amazon's cloud infrastructure. This simple idea creates an incredibly consistent and predictable environment, ensuring your application runs the exact same way on a developer's laptop as it does in production. It’s become the go-to standard for building cloud applications that can scale and handle real-world demands.
Why Docker and AWS are a Modern Deployment Powerhouse
In the SaaS world, speed is everything. If your deployment process is slow and manual, you’re not just being inefficient—you're actively hindering your ability to innovate and grow. A solid docker aws deploy strategy isn't a "nice-to-have" anymore; it's a fundamental part of the business that allows teams to ship features faster, more reliably, and often at a lower cost.
Think about a founder trying to roll out a new AI feature. With a traditional setup, the whole process is a minefield. The feature works perfectly on a developer's machine but breaks in production because of some tiny difference in the server's configuration. This classic "it works on my machine" headache can lead to days of wasted time and frustration. And when it comes time to scale? You’re stuck manually provisioning and configuring new servers, which is both slow and prone to human error.
This is exactly the problem that Docker was built to solve.
To put this shift into perspective, let’s quickly compare the old way with the new.
Traditional VM Deployment vs Docker on AWS
| Metric | Traditional VM Deployment | Docker AWS Deploy |
|---|---|---|
| Startup Time | Minutes (booting a full OS) | Seconds (starting a lightweight container) |
| Resource Use | High (each VM runs a full OS) | Low (containers share the host OS kernel) |
| Portability | Low (tied to specific VM configurations) | High (runs on any host with Docker) |
| Consistency | Prone to "environment drift" | Guaranteed via a single image definition |
| Scaling | Slow and manual provisioning | Fast and automated via orchestration |
This table shows why so many of us in the industry have moved on. The efficiency gains are just too significant to ignore.
The Power of a Consistent Environment
Docker changes the game by bundling your application and everything it needs to run—libraries, system tools, code, and runtime—into a single, isolated package called a container. This container is a standardized unit that you can move around and run anywhere.
This approach brings some immediate, practical benefits:
- No More Environment Drift: Your app operates in an identical environment from development all the way to production. The bugs caused by configuration mismatches simply disappear.
- Faster Developer Onboarding: A new developer can get a complex application running on their local machine with just one or two commands. This cuts setup time from days to minutes.
- Simplified Dependencies: All dependencies live inside the container, which means you never have to worry about conflicts on the host machine.
This container-based strategy is also a key enabler for tackling bigger challenges, like modernizing old, clunky systems. By containerizing different pieces of an application, businesses can start adopting more effective legacy system modernization approaches.
Gaining Speed, Scalability, and Savings
When you pair Docker with a cloud provider like AWS, its advantages are amplified. AWS gives you the flexible, on-demand infrastructure you need to run your containers at any scale, whether you're just prototyping or serving millions of users globally.
The real impact here is how it changes the way engineering teams work. I've seen deployment cycles shrink from weeks to minutes, rollbacks become routine and safe, and infrastructure costs drop significantly. All that saved time goes right back into building features that matter to customers, not managing servers.
The market data backs this up. The Docker container market is expected to jump from USD 7.41 billion in 2026 to a massive USD 19.26 billion by 2031, largely driven by its integration with cloud platforms like AWS. We're also seeing over 80% of enterprises incorporating containers into their CI/CD pipelines, which has been shown to double how often they can deploy and cut rollback failures by 60%.
In this guide, I'll walk you through how to use this powerful combination to your advantage, helping you reclaim your team's time and build a much more resilient foundation for your business.
Containerizing Your First Application with Docker
Alright, enough theory. Let's get our hands dirty and turn your application code into a portable, self-contained unit. This is the crucial first step in any docker aws deploy strategy: packaging your app into a Docker image.
Everything starts with a Dockerfile. This is just a plain text file, but it's the blueprint for your container. Think of it as a step-by-step recipe that Docker follows to assemble your application, its dependencies, and its runtime environment into a single, predictable image.
Crafting an Effective Dockerfile
Let's say we're working with a common Python service built with the FastAPI framework. A solid, production-ready Dockerfile for it would look like this:
Start from an official Python base image
FROM python:3.11-slim
Set the working directory inside the container
WORKDIR /app
Copy the dependency file and install dependencies
COPY requirements.txt .
RUN pip install –no-cache-dir -r requirements.txt
Copy the rest of the application code
COPY . .
Command to run the application
CMD ["uvicorn", "main:app", "–host", "0.0.0.0", "–port", "80"]
Let's quickly break down what's happening here:
FROM python:3.11-slimtells Docker to start with a lightweight, official Python image. Always a good idea to start slim.WORKDIR /appcreates a dedicated folder for our app inside the container and makes it the default directory for the commands that follow.COPY requirements.txt .andRUN pip install...are split intentionally. This is a classic optimization trick that uses Docker's layer caching. If your code changes but your dependencies don't, Docker won't need to reinstall everything, saving you a ton of time.COPY . .then brings the rest of your application source code into the image.CMDspecifies the command that will run when the container starts up, in this case, launching our FastAPI server.
This approach gives you efficient, repeatable builds. If you're not on the Python stack, the principles are the same. We have another detailed walkthrough that shows you how to dockerize a Node.js application which covers the same concepts for a different ecosystem.
Optimizing for Smaller and More Secure Images
A basic Dockerfile is a great start, but for production, you need images that are lean and secure. Smaller images transfer faster and have a smaller attack surface. Two simple techniques will get you most of the way there: a .dockerignore file and multi-stage builds.
First, the .dockerignore file. It works exactly like a .gitignore file, telling Docker to exclude specific files and folders when building the image. You absolutely do not want local configuration, secrets, or bulky folders like .git or node_modules ending up in your final image.
A typical .dockerignore might look like this:
.git
.venv
pycache/
*.pyc
*.pyo
*.pyd
.DS_Store
This is a simple but critical step. It keeps your image clean, prevents secrets from leaking, and even speeds up the build by reducing the amount of data sent to the Docker daemon.
I’ve seen teams accidentally ship gigabytes of unnecessary data in their images, including local git histories and test datasets. A well-configured
.dockerignoreis one of the easiest wins for security and performance. It’s a non-negotiable step.
For the biggest impact, however, you need to use multi-stage builds. This is a game-changer. It lets you use one container stage for building your app (complete with all the compilers and heavy dependencies) and a second, separate stage for the final runtime image.
Here's a perfect example for a compiled language like Go:
Stage 1: Build the application
FROM golang:1.19 AS builder
WORKDIR /app
COPY . .
RUN CGO_ENABLED=0 go build -o my-app
Stage 2: Create the final, lean image
FROM alpine:latest
WORKDIR /root/
COPY –from=builder /app/my-app .
CMD ["./my-app"]
Notice how we copy only the compiled binary from the builder stage into the final image, which is based on the tiny alpine image. Everything else—the Go compiler, source code, and intermediate files—is discarded.
This technique can easily slash your image size by over 90%, taking it from hundreds of megabytes down to just a few. For any docker aws deploy pipeline, that means faster deployments and a much harder target for attackers.
With these optimizations complete, you have a lean, secure, and production-ready image running locally. Now, it's time to get it to the cloud.
Alright, you’ve containerized your application. Now, where do you store that Docker image so AWS can actually use it?
That's the job of Amazon Elastic Container Registry (ECR). Think of it as a private, super-secure library just for your Docker images, sitting right inside your AWS account. It's the standard first stop for any professional docker aws deploy workflow because it plugs directly into services like ECS and EKS.
Using ECR means your images are kept private and highly available, ensuring only the services and people you authorize can pull and deploy your code.
Creating Your First ECR Repository
You’ll need a repository inside ECR to hold the different versions (or tags) of your image. You can whip one up quickly through the AWS Management Console, which is great for your first time, or you can script it with the AWS Command Line Interface (CLI) for repeatable, automated setups.
If you're using the console:
- Head over to the ECR service page and hit Create repository.
- Make sure you select Private—you almost always want your app's images kept secure.
- Give it a descriptive name, like
my-saas-app. - Enable Tag immutability. I can't stress this enough. It prevents someone from accidentally overwriting a tag like
v1.2-stable, which can cause chaos in production. Once a tag is pushed, it's locked. - Also, turn on Scan on push. This is free vulnerability scanning from AWS that automatically checks your image for known security issues the moment you upload it.
For those who live in the terminal or are building out infrastructure-as-code scripts, you can do the exact same thing with a single CLI command.
aws ecr create-repository
–repository-name my-saas-app
–image-tag-mutability IMMUTABLE
–image-scanning-configuration scanOnPush=true
–region us-east-1
This is the ideal way to manage repositories in any sort of automated CI/CD pipeline.
Authenticating, Tagging, and Pushing Your Image
Before Docker on your local machine can push to your private ECR repository, it needs to get credentials. AWS makes this simple by generating a temporary authentication token.
Just run this command to log your Docker client into ECR.
aws ecr get-login-password –region us-east-1 | docker login –username AWS –password-stdin YOUR_AWS_ACCOUNT_ID.dkr.ecr.us-east-1.amazonaws.com
Make sure to replace YOUR_AWS_ACCOUNT_ID and us-east-1 with your own account ID and region. You’ll get a "Login Succeeded" message when it works.
A quick heads-up: This login token expires after 12 hours. That’s intentional for security. In a CI/CD pipeline, your build server will simply re-authenticate for every single run, which is the standard, secure way to operate.
With authentication sorted, you now need to tag your local image so Docker knows its destination. The tag needs to follow a specific format: REGISTRY_URL/REPOSITORY_NAME:TAG.
If your local image is my-app:1.0, you'd tag it for ECR like this:
docker tag my-app:1.0 YOUR_AWS_ACCOUNT_ID.dkr.ecr.us-east-1.amazonaws.com/my-saas-app:1.0
Now for the final step—the push.
docker push YOUR_AWS_ACCOUNT_ID.dkr.ecr.us-east-1.amazonaws.com/my-saas-app:1.0
And that's it. Your application image is now sitting safely in ECR, has been scanned for vulnerabilities, and is primed for deployment across the AWS ecosystem.
Alright, you’ve successfully built a lean Docker image and pushed it to Amazon ECR. Now for the fun part: getting your application live on the web without touching a single server. This is exactly where the combination of Amazon Elastic Container Service (ECS) and AWS Fargate really comes into its own, forming the backbone of a modern docker aws deploy workflow.
Think of Fargate as the serverless engine that powers your containers. You get to run your Docker applications without ever having to provision, configure, or scale virtual machines. You just define what your app needs, and Fargate takes care of the underlying infrastructure.
Setting Up Your ECS Cluster
First things first, you need an ECS Cluster. Don't let the name intimidate you; it's simply a logical grouping for your applications. With Fargate, this cluster is an empty shell—a managed environment where your containers will run, but without you having to add any servers to it. AWS handles all that heavy lifting for you.
Creating one is incredibly simple:
- Head over to the ECS console in AWS.
- Go to Clusters and click Create cluster.
- Give your cluster a descriptive name, something like
production-services. - Most importantly, choose the AWS Fargate (serverless) infrastructure option.
And that’s it. You now have a serverless environment ready for your containers. No instances to patch, no scaling groups to configure, no security updates to worry about on the OS level.
Defining Your Application with a Task Definition
With the cluster ready, our next job is to tell ECS what to run. We do this using a Task Definition, which is essentially a detailed blueprint for your application. It spells out all the critical details: which Docker image to pull, how much CPU and memory to give it, and which port your application uses.
This definition is just a JSON file, but it's the recipe that connects your ECR image to the Fargate runtime.
A well-crafted Task Definition is the heart of a reliable deployment. This is where you declare your app's resource needs and operational rules. Getting this right is the key to making sure your application runs predictably and efficiently from day one.
For a typical web service, your task definition would point to your ECR image URI, maybe request 0.5 vCPU and 1 GB of memory, and map container port 80. You’re giving AWS a complete set of instructions for running and managing your container.
Launching Your Application with an ECS Service
You've got the cluster (the "where") and the task definition (the "what"). The final piece is the ECS Service, which handles the "how many" and "how to run it." A service takes your task definition and makes sure a specific number of copies, or "tasks," are always up and running. If a task crashes or fails a health check, the service automatically launches a replacement.
Here's what the service automates for you:
- Desired Count: You can tell the service you want 2 copies of your app running for high availability, and it will work tirelessly to maintain that number.
- Load Balancing: The service integrates seamlessly with an Application Load Balancer (ALB), automatically distributing traffic across all your healthy tasks.
- Automated Deployments: When you update your task definition with a new image, the service performs a rolling update. It gradually replaces old tasks with new ones, ensuring zero downtime for your users.
This is where the true power of a serverless docker aws deploy strategy becomes obvious. You define your application and how many instances you need, and ECS with Fargate handles the rest.
In the fast-paced B2B and SaaS world, this kind of efficiency is a game-changer. For teams deploying AI models with FastAPI, you can get the initial ECS Fargate setup done in just a few hours. From there, CI/CD pipelines can push out updates in under 12 minutes. This speed translates to real cost savings—a workload handling 100 requests per second can start at around $45 per month. You can read more about the ROI for SaaS founders and how these deployment models pay off.
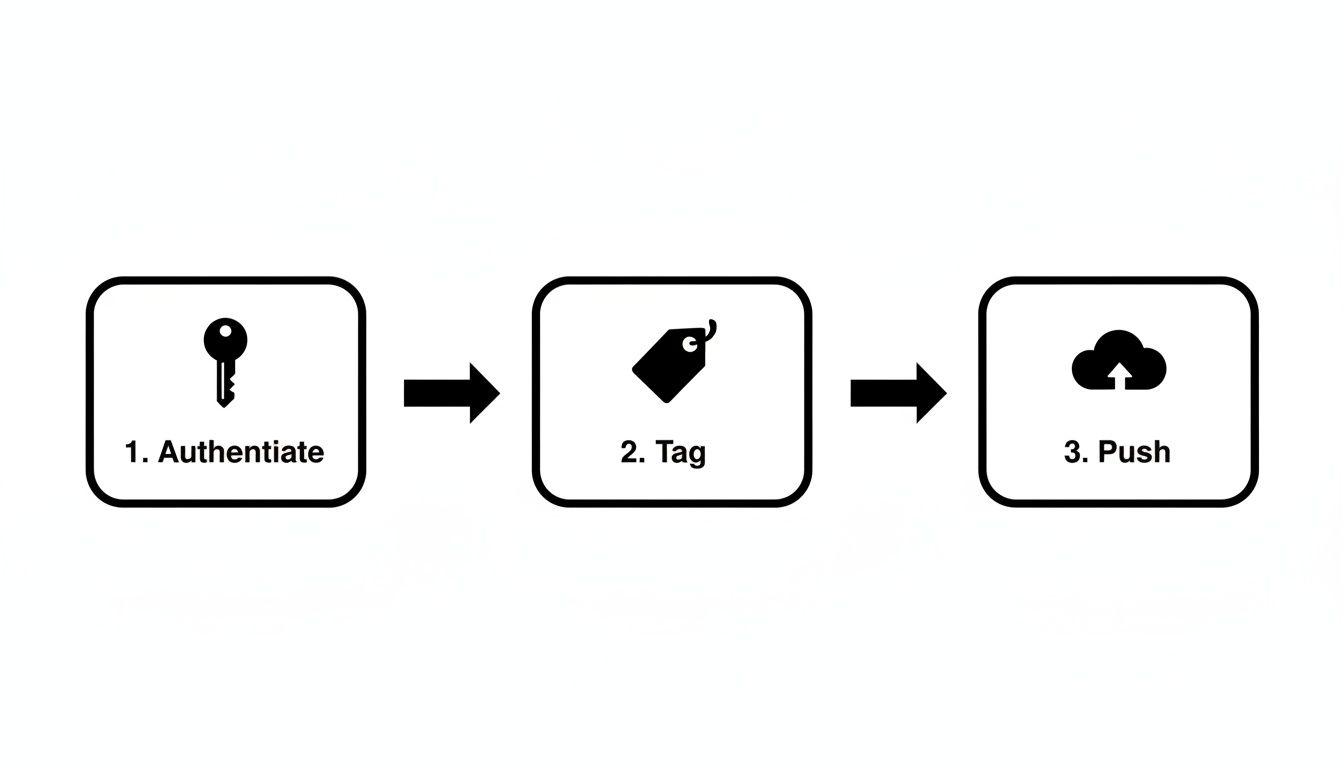
The diagram above boils down the pre-deployment workflow: authenticate, tag, and push. These three commands are the bridge between your local machine and the cloud registry, setting the stage for Fargate to pull down your image and bring it to life.
By combining a logical cluster, a blueprint in the task definition, and a self-healing service, you build a robust and scalable deployment without ever having to think about a server again.
Ready to stop babysitting your deployments? Let's talk about building a real, hands-off CI/CD pipeline.
If you're still manually running docker build and docker push commands every time you want to release an update, you're leaving a ton of speed and safety on the table. The whole point of a docker aws deploy workflow is to get your code from a git push to a live, running application without any manual intervention. This is what Continuous Integration and Continuous Deployment (CI/CD) is all about, and it's the secret to shipping features quickly and reliably.
By setting up an automated pipeline, you build a consistent, repeatable process. This means fewer "it worked on my machine" moments and more confidence every time you merge to main. Let's walk through how you can set this up using one of the most popular tools out there: GitHub Actions.
Automating with GitHub Actions
The engine for any GitHub Actions pipeline is a simple YAML file you place in your repository's .github/workflows/ directory. This file is your blueprint—it tells GitHub what to do and when to do it, usually in response to an event like a push to a specific branch.
So, what does a typical Docker-to-ECS deployment workflow actually do? It's a logical sequence of steps:
- Check out the code: First, the pipeline grabs the latest version of your code from the repository.
- Get AWS credentials: Next, it needs to talk to AWS. This is done by securely logging in using secrets you’ve stored in GitHub—never, ever hardcode your keys in the workflow file itself.
- Log in to ECR: With AWS access sorted, the workflow authenticates with your Amazon Elastic Container Registry so it can push the new image.
- Build, tag, and push: Here's the core of the work. The pipeline builds your Docker image, gives it a unique tag (I highly recommend using the Git commit hash for easy tracking), and pushes it up to your ECR repository.
- Deploy to ECS: Finally, the magic happens. The pipeline tells your ECS service to pull and deploy the new image version, which kicks off a seamless, zero-downtime rolling update for your users.
Once this is set up, the process is identical every single time. No more typos in commands or forgotten steps—just consistent, automated deployments.
A Look at AWS CodePipeline
While GitHub Actions is a fantastic all-rounder, you shouldn't overlook AWS's native solution, AWS CodePipeline. Its main selling point is its deep, seamless integration with the rest of the AWS ecosystem, which can simplify things quite a bit.
With CodePipeline, you can visually map out your entire process, connecting a source like AWS CodeCommit (or GitHub) to a build stage with AWS CodeBuild, and finally deploying to services like ECS.
To help you figure out which tool might be a better fit for your team, let's compare them head-to-head.
CI/CD Tooling at a Glance
| Feature | GitHub Actions | AWS CodePipeline |
|---|---|---|
| Integration | Excellent with GitHub; uses official actions for AWS. | Native, seamless integration across all AWS services. |
| Configuration | Entirely code-based (YAML files) living in your repo. | Can use a visual editor in the console or Infrastructure as Code. |
| Cost | Generous free tier for public and private repos. | Pay-as-you-go model for active pipelines; no upfront cost. |
| Ecosystem | Huge marketplace of community-built actions for almost anything. | Primarily focused on AWS-specific integrations. |
Ultimately, both are solid choices for automating your deployments. They just come at the problem from slightly different angles.
A robust CI/CD pipeline is the engine of modern software delivery. It’s not just about automation; it’s about creating a culture of confidence where developers can push code knowing there’s a safety net to catch issues and a clear path to production.
As you build out your pipeline, it's wise to lean on established software deployment best practices for the cloud to ensure your process is as resilient as possible.
So, which one should you choose? Honestly, it often boils down to your team's existing workflow. If your team lives and breathes GitHub, sticking with GitHub Actions feels natural. If you're all-in on the AWS ecosystem, CodePipeline's native connections might save you some setup headaches.
No matter which tool you pick, don't forget about security. Managing secrets properly is non-negotiable, so be sure to check out our guide on DevOps secrets management to keep your credentials safe. Either path will lead you to a fully automated system that is the cornerstone of any modern docker aws deploy strategy.
Choosing the Right AWS Deployment Target
While using ECS with Fargate is a fantastic modern approach for a docker aws deploy strategy, it isn't the only game in town. The best deployment target for your application really comes down to your specific needs, your team's skillset, and how you plan to scale. Getting this decision right from the start can save you a world of pain and runaway costs down the road.
Sometimes, the old ways are the best ways. Deploying a Docker container directly onto a plain old Amazon EC2 instance is still a completely viable—and often necessary—path.
When to Stick with EC2 Instances
Running Docker on a virtual machine that you manage yourself gives you ultimate control over the environment. Fargate is great because it hides the server from you, but EC2 puts you right in the driver's seat. That level of control is essential in a few key situations.
- Strict Compliance Needs: If you're in an industry with tough regulations (think specific PCI or HIPAA rules), you might be required to have direct control over the OS, manage patching schedules, or configure networking in ways that serverless options just don't allow.
- GPU or Specialized Hardware: Does your app need a beefy GPU for machine learning tasks? Or maybe a high-memory instance for a massive database? EC2 is how you get direct access to that specialized hardware.
- Legacy Tooling: You might have established security agents or monitoring tools that absolutely must be installed on the host OS. If that's the case, a managed environment like Fargate simply won't work.
The compromise here is pretty straightforward: you get granular control, but you also take on the full responsibility of managing, patching, and scaling that server. For a simple app with a single container and no complex orchestration, this can be a perfectly good, no-frills solution.
Choosing EC2 is a conscious decision to trade serverless convenience for absolute control. It’s the right call when you have a specific, non-negotiable requirement that only direct server access can satisfy. Don't over-engineer if you don't have to.
Graduating to Kubernetes with Amazon EKS
At the other end of the complexity spectrum sits Amazon Elastic Kubernetes Service (EKS). If ECS and Fargate are all about simplicity and tight AWS integration, EKS is about raw power, flexibility, and plugging into the vast cloud-native ecosystem. There's a reason Kubernetes has become the industry standard for orchestrating massive, complex microservices applications.
EKS is Amazon's managed Kubernetes offering. It takes the nightmare of running the Kubernetes control plane off your plate, but you're still in charge of the worker nodes where your containers run (though, to be fair, you can now use Fargate with EKS, too).
You should start seriously looking at EKS when your team is:
- Juggling a large and ever-growing number of microservices.
- Building for a multi-cloud or hybrid-cloud future, since Kubernetes is designed to be portable.
- Ready and willing to build some serious Kubernetes expertise in-house. It’s not for the faint of heart.
Moving to EKS is a major strategic decision. It has a much steeper learning curve than ECS, but it offers an unmatched level of power for managing distributed systems at scale. Honestly, for most teams, it's overkill. Even when you're thinking serverless, there are other paths to consider. For event-driven workloads, you can check out our guide on running Docker on AWS Lambda.
Ultimately, the right choice depends on where you are on your journey. Startups and teams that need to move fast will feel right at home with ECS and Fargate. If you have very specific hardware or compliance demands, EC2 is your workhorse. And as your application architecture evolves into a complex web of microservices, graduating to EKS often becomes the logical next step.
Common Questions About Deploying Docker on AWS
When you're planning a docker aws deploy, a few key questions always come up. Let's walk through the answers I typically give to engineering teams trying to find the best path forward.
How Much Does It Cost to Run a Docker Container on AWS?
This is always the first question, and the answer really boils down to which service you pick.
If you go with ECS on Fargate, you're only paying for the vCPU and memory your container is actively using, billed by the second. For a small web app, you could be looking at just $20-50 per month. This makes it a fantastic, cost-effective choice for new projects or applications where traffic is unpredictable, since you're not paying for idle server time.
On the other hand, if you run your container on a dedicated EC2 instance, you pay for the entire virtual machine around the clock, regardless of whether your app is busy. This offers predictable billing but can be less efficient if your traffic comes in waves.
What Is the Difference Between ECS and EKS?
I often tell people to think of this as a choice between simplicity and raw power.
Amazon ECS is AWS's own container orchestration service. It's built to work seamlessly with the rest of the AWS ecosystem, which makes it the most straightforward way to get a Docker container up and running. If your team wants to move quickly without getting bogged down in a complex setup, ECS is almost always the right call.
Amazon EKS is the managed Kubernetes service from AWS. It gives you the full, incredible power and flexibility of the open-source Kubernetes platform. This is a game-changer for managing complex microservices or if you're building a multi-cloud strategy. Just be aware that this power comes with a steeper learning curve and more operational overhead.
My rule of thumb is this: Choose ECS for speed, simplicity, and tight AWS integration. Go with EKS when you absolutely need the massive power of Kubernetes for a large-scale architecture or cloud portability.
How Do I Monitor My Deployed Docker Containers?
The good news is that AWS provides excellent monitoring tools right out of the box. Your main tool will be Amazon CloudWatch. It automatically pulls in logs and essential performance metrics like CPU and memory utilization directly from your running ECS tasks.
You can take it a step further by creating CloudWatch Alarms. For example, you can set an alarm to notify you if your container's CPU usage spikes above 80% for more than five minutes. These alarms can do more than just send an alert; you can configure them to automatically trigger actions, like spinning up another container to handle the increased load.
At MakeAutomation, we live and breathe this stuff. We help businesses build the exact automation and deployment pipelines they need to scale effectively. Whether it's crafting a rock-solid CI/CD workflow or fine-tuning your cloud infrastructure, our goal is to help you save time and accelerate growth. Explore our tailored automation solutions.