

Jest Mock Component in React: A Complete Guide
Your dashboard test passed yesterday. Today it fails because a child modal changed, a chart library touched the DOM differently, or some imported component pulled in side effects you never meant to test in the first place. That's the moment many developers start searching for a reliable Jest mock component pattern.
In a small React app, you can often render the full tree and move on. In a large codebase, that approach gets expensive fast. Tests become noisy, failures stop pointing to the actual problem, and developers start distrusting the suite.
The fix isn't “mock everything.” That usually creates a different mess. The key skill is choosing the right mocking strategy for the job: auto-mock, custom inline mock, manual mock, spy, or no mock at all. That decision matters more than the syntax.
Why Mocking Components Is Crucial for Reliable Tests
A common failure pattern looks like this: you're testing a parent component that owns the business logic, but one of its children does too much. Maybe it fetches data. Maybe it opens portals. Maybe it depends on browser APIs your test environment doesn't fully simulate. The test fails, but the parent is fine.
That's where component mocking earns its keep.

Jest's mock system is built to replace real implementations with test doubles while still tracking call details such as how many times something was called, what arguments it received, what it returned, and even the this value for each invocation, as documented in the Jest mock functions documentation. For React tests, that matters because you can stop rendering the entire child subtree and instead verify the interaction between parent and child.
Isolation is the real point
The best reason to mock a component isn't speed by itself. It's test isolation.
When I mock a child component, I'm saying: “This test is about the parent's behavior, not the child's rendering details.” That keeps the assertion surface smaller and the failure signal cleaner. If the parent passes the wrong props, the test should fail. If the child changes its internal markup, the parent test shouldn't care.
Practical rule: Mock a child when its internal behavior is irrelevant to the parent test's purpose.
This idea shows up outside frontend testing too. If you want a broader framing on isolating checks and reducing false confidence in test systems, this practical guide for CTOs and AI teams is useful because it separates what you're verifying from what you're validating.
What mocking helps you verify
A good mock lets you test questions like these:
- Did the parent render the child at all? Useful for conditional branches.
- Did it pass the right props? Critical when the child drives navigation, modal state, or callbacks.
- Did it trigger the right interaction path? Especially when the child is expensive or noisy to render.
- Did the parent produce the right visible output after replacing the child? That's the sanity check that keeps mocks honest.
What mocking does not solve
Mocking won't tell you whether the actual parent-child integration works. If you replace too much, you can end up with a passing test suite that says nothing about the actual UI. That's why strong teams keep a mix of isolated unit tests and a smaller number of integration-style tests that render more of the full tree.
A test should fail for the reason you care about. If a child component can fail independently of the parent behavior under test, it's a candidate for mocking.
That's the frame to keep in mind for every Jest mock component decision that follows.
The Foundation of Mocking with jest.mock
Most React component mocking starts with one call: jest.mock().
The simple case is a parent that renders a child. You want to test the parent without pulling the child's actual UI into the test.
Start with a parent and child
// ChildComponent.jsx
export default function ChildComponent({ title }) {
  return <section>{title}</section>;
}
// ParentComponent.jsx
import ChildComponent from './ChildComponent';

export default function ParentComponent() {
  return (
    <div>
      <h1>Dashboard</h1>
      <ChildComponent title="Revenue" />
    </div>
  );
}
A minimal test might look like this:
// ParentComponent.test.jsx
import { render, screen } from '@testing-library/react';
import ParentComponent from './ParentComponent';

jest.mock('./ChildComponent', () => () => (
  <div data-testid="child-component" />
));

test('renders the parent without the real child UI', () => {
  render(<ParentComponent />);

  expect(screen.getByText('Dashboard')).toBeInTheDocument();
  expect(screen.getByTestId('child-component')).toBeInTheDocument();
});
That pattern works because Jest replaces the imported module with your stand-in implementation. A long-running convention in React testing is to return a lightweight placeholder like <mock-modal data-testid="modal" />, which keeps parent tests focused and deterministic. One detail matters more than people expect: the mocked module path must match the original import exactly, as described in this walkthrough on mocking React components with Jest.
What auto-mocking gives you and what it doesn't
You can also call jest.mock('./ChildComponent') without a factory. Jest then replaces the module with a mock function. That's useful if you mainly want call tracking, but for React components it often isn't enough because you still need something renderable.
Custom mock factories are usually clearer in component tests because they let you control the DOM output. You can add a data-testid, forward props, or render children. That makes the mock usable instead of just technically mocked.
Here's a stronger version:
jest.mock('./ChildComponent', () => ({
  __esModule: true,
  default: ({ title, children }) => (
    <div data-testid="child-component">
      <span>{title}</span>
      {children}
    </div>
  ),
}));
That shape becomes important with ES modules. More on that later.
A decision rule that works in production
Use basic jest.mock() when all of these are true:
- The child is irrelevant to the test. You only care that the parent renders or interacts with it.
- The child is noisy. It has side effects, portals, async work, or heavy rendering.
- The contract is small. You can stub the public props without recreating the child's behavior.
Don't use a barebones mock if your test needs confidence in real composition. In those cases, rendering the actual child often tells you more.
If you want a broader module-level reference for adjacent patterns, this guide to mocking modules in Jest is a useful complement because component mocking is really a specialized module-mocking problem.
The most reliable inline mock is usually the boring one: a tiny renderable stub that preserves the child's public interface and nothing else.
Creating Reusable Manual Mocks for Scalability
Inline mocks are fine until you've written the same stub in ten test files. That's when teams start paying the maintenance tax.
If a dependency is shared across the app, a manual mock is usually the cleaner move. Jest supports this with a __mocks__ directory, and for larger React codebases that pattern is often the best balance between consistency and effort. Jest can auto-resolve those manual mocks, and the trade-off is straightforward: reusable test doubles are stable, but they can drift away from real behavior if nobody maintains the contract, as explained in the Jest manual mocks documentation.
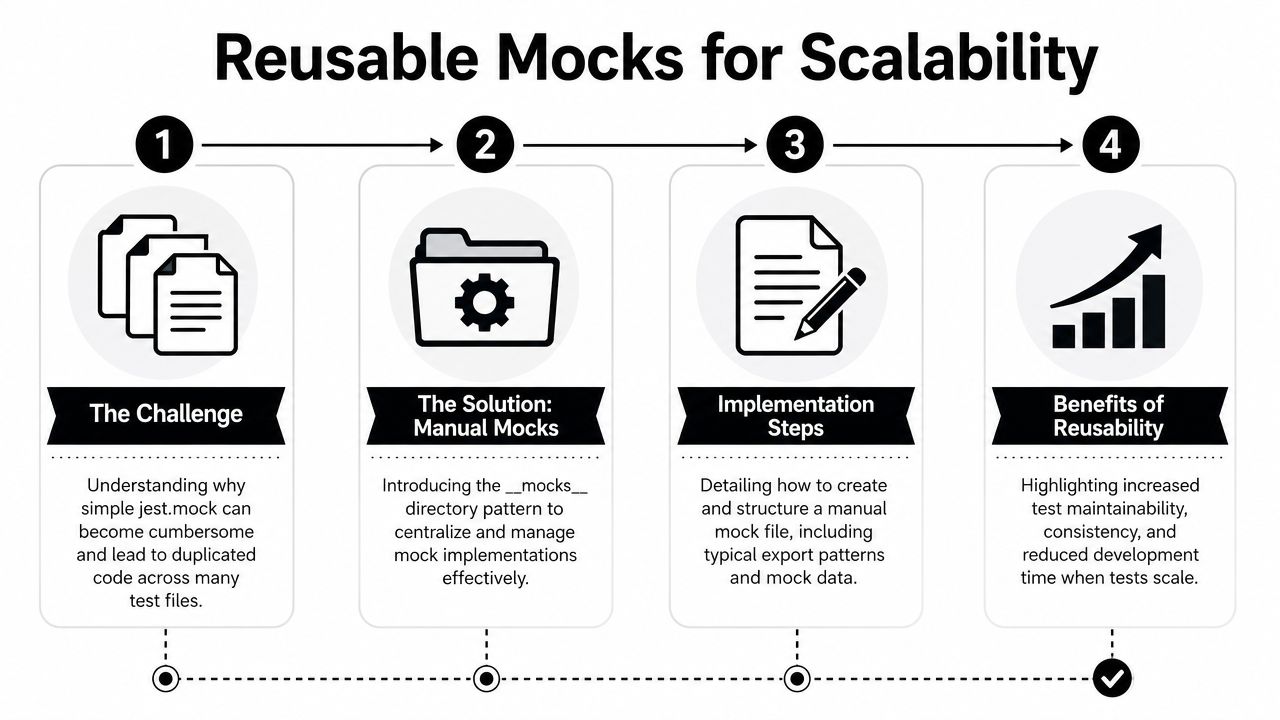
What the file structure usually looks like
src/
  components/
    Modal.jsx
    __mocks__/
      Modal.jsx
Then in your test:
jest.mock('../components/Modal');
And the manual mock might be:
export default function MockModal({ isOpen, title, children }) {
  if (!isOpen) return null;

  return (
    <div data-testid="mock-modal">
      <h2>{title}</h2>
      {children}
    </div>
  );
}
This works well for design system components, shared modals, map widgets, rich editors, and third-party wrappers that appear everywhere.
What a good manual mock preserves
A reusable mock shouldn't imitate the full component. It should preserve the public contract.
That usually means:
- Keep prop names stable. If the actual component takes
isOpen, don't rename it toopenin the mock. - Render
childrenwhen the actual component does. Parent tests often depend on composition. - Avoid hardcoded success DOM. If the mock renders exactly what the test expects, you're testing the mock, not the parent.
- Stay narrow. Every extra fake behavior increases maintenance cost.
A manual mock should model the shape of the dependency, not recreate the dependency.
Here's a quick gut check I use:
| Check | Good sign | Bad sign |
|---|---|---|
| Parent still tested? | Parent assertions still target parent output | Test only passes because mock prints expected text |
| Contract preserved? | Props and children match real usage | Mock uses different prop names or ignores children |
| Maintenance burden | Shared dependency justifies reuse | One-off dependency gets a permanent mock |
A short video walkthrough can help if your team is standardizing this pattern across many suites.
When manual mocks are the wrong choice
Don't create a manual mock for every child component. That's how test suites become abstract and untrustworthy.
Manual mocks are worth it when the same dependency appears across many tests and the stand-in can remain simple. They're a bad fit when the dependency changes frequently or when the parent test genuinely depends on integration behavior. In that case, the mock becomes a stale second implementation.
Gaining Granular Control with Spies and Implementations
Sometimes replacing a component is too blunt. You need to observe usage, vary behavior between tests, or return different output on consecutive calls. That's where spies and per-test implementations become useful.
A practical pattern is to mock the module, import it as a namespace, and configure the exported mock with mockReturnValue(), mockImplementation(), or mockImplementationOnce(). That approach works because Jest swaps the original export for a mock function you can control, as shown in this guide on mocking imports with Jest.
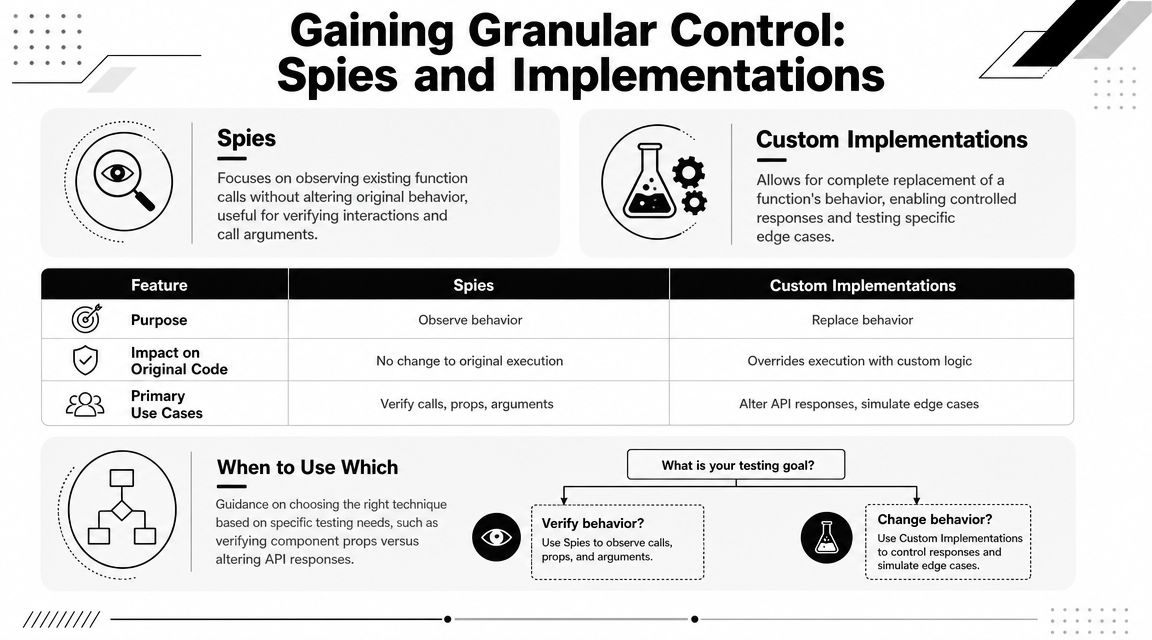
Spy versus full implementation replacement
A spy is useful when you want visibility into calls without permanently changing everything about the dependency. A custom implementation is better when the rendered output or returned value must change to drive a specific branch.
Here's the comparison I use in day-to-day work:
| Technique | Best For | Control Level |
|---|---|---|
jest.mock() with simple stub |
Isolating a child component | Medium |
jest.spyOn() |
Observing usage with less replacement | Medium |
mockImplementation() |
Per-test behavior changes | High |
mockImplementationOnce() |
Simulating consecutive states | High |
If you want a deeper reference focused on function-level behavior, this guide to mocking functions in Jest is useful because component mocks often become function mocks once you inspect exports directly.
A practical namespace pattern
import * as ChildModule from './ChildComponent';
import { render, screen } from '@testing-library/react';
import ParentComponent from './ParentComponent';

jest.mock('./ChildComponent');

beforeEach(() => {
  jest.clearAllMocks();
});

test('renders a custom child stub', () => {
  ChildModule.default.mockImplementation(({ label }) => (
    <div data-testid="child-stub">{label}</div>
  ));

  render(<ParentComponent />);

  expect(screen.getByTestId('child-stub')).toBeInTheDocument();
});
This pattern is especially useful when different tests need different child behavior.
When mockImplementationOnce() is the right tool
Some parent components render the same child more than once or across changing states. In those cases, mockImplementationOnce() gives you precise control.
ChildModule.default
  .mockImplementationOnce(() => <div data-testid="step-one" />)
  .mockImplementationOnce(() => <div data-testid="step-two" />);
That's handy when a parent renders a sequence, retries a dependency, or conditionally re-renders based on state transitions.
Working advice: Use
mockImplementationOnce()when the order of calls matters. UsemockImplementation()when the behavior should stay stable for the whole test.
Where developers get this wrong
The usual mistake is using high-control mocks for low-value tests. If all you need is “the child exists,” don't build a fully programmable fake. Another mistake is asserting too much about implementation details, such as exact prop objects that include unrelated fields. That makes tests brittle.
Granular control is powerful, but it should be applied narrowly. The best tests use the minimum mock power needed to expose the parent behavior you care about.
Navigating Modern React Testing Nuances
Most tutorials stop at jest.mock('./Child'). Real codebases aren't that simple. They use default exports, named exports, barrel files, wrappers, HOCs, and TypeScript. That's where Jest mock component patterns usually break down.
One pain point comes up constantly: ES modules. Mock objects often need __esModule: true, especially when you're replacing default exports or mixed default and named exports. Another issue is more strategic than technical: over-mocking can produce tests that pass while real user flows break, a concern discussed in this article on mocking React components with Jest.
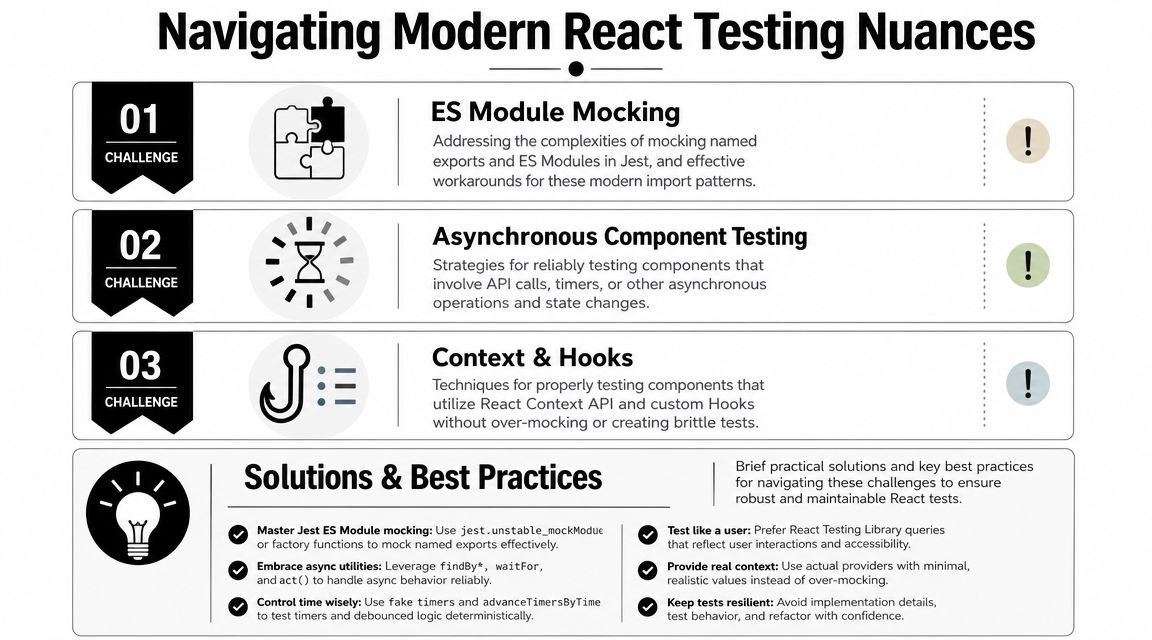
ES module patterns that actually work
If a component is a default export, your mock usually needs this shape:
jest.mock('./ChildComponent', () => ({
  __esModule: true,
  default: () => <div data-testid="child-component" />,
}));
If the module has named exports:
jest.mock('./widgets', () => ({
  __esModule: true,
  Chart: () => <div data-testid="chart" />,
  Summary: () => <div data-testid="summary" />,
}));
If it has both default and named exports:
jest.mock('./widgets', () => ({
  __esModule: true,
  default: () => <div data-testid="default-widget" />,
  Chart: () => <div data-testid="chart" />,
}));
Most “is not a function” failures come from getting that shape wrong.
TypeScript and contract-safe mocks
In TypeScript projects, the biggest risk isn't compiler noise. It's contract drift. If your mock accepts the wrong props, your test can still compile with enough type coercion and still lie to you.
The practical fix is simple:
- Type mocks around the actual prop contract
- Forward props that the parent depends on
- Avoid
anyin shared manual mocks unless you enjoy finding errors late
If your app builds dynamic rendering patterns, especially with component maps or conditional component loading, this write-up on React dynamic components is relevant because those patterns often influence whether a mock should replace a module or whether the component should be exercised more fully.
A decision framework for when not to mock
This is the part most articles skip.
Use a real child component when:
- The parent-child integration is the behavior under test
- The child output is user-visible and important
- The child is simple enough that mocking adds more complexity than value
- A mock would hide failures in composition, context, or accessibility
Mock the child when:
- It has unrelated side effects
- It depends on data or browser behavior outside the test's purpose
- It's expensive or noisy to render
- You only need to verify props, presence, or interaction boundaries
If removing the real child makes the test more truthful about the parent, mock it. If removing the real child makes the test less representative of user behavior, render it.
That rule has held up better for me than any blanket philosophy about “always mock” or “never mock.”
Common Pitfalls and Debugging Strategies
The hard part of a Jest mock component setup usually isn't writing the first mock. It's debugging the weird failure three weeks later when someone changes an export, adds a wrapper, or reuses a stale manual mock.
A niche tool built specifically because mocking many React components with Jest is “boring and repetitive” is a good reminder that scaling this pattern creates real maintenance pain, not just syntax questions, as noted in the jest-mock-external-components project.
The failures that come up most
Wrong export shape
You mock a default export like a named export, or vice versa. Then you get TypeError: ... is not a function or React complains that the element type is invalid.
Fix it by matching the original module exactly. If the module is ESM, add __esModule: true and mirror the original export shape.
Mock path mismatch
Your jest.mock() string doesn't exactly match the import used by the component under test. The mock never applies, and you spend time debugging the wrong thing.
Check the import path character for character. Relative path differences are enough to break the setup.
State leaking between tests
One test changes a mock implementation, and the next test inherits it. That kind of pollution makes suites flaky.
Use beforeEach(() => jest.clearAllMocks()) when you're reusing mock functions. If you use spies, restore them in afterEach().
The debugging workflow that saves time
When a mock fails in a confusing way, I usually walk through this order:
- Inspect the component's import style. Default, named, or mixed.
- Compare the mock object shape. It must mirror the import contract.
- Verify the mock path. Exact match only.
- Strip the mock down. Replace it with the smallest possible renderable stub.
- Reset between tests. If the bug disappears, it was leaked state.
The over-mocking problem
A lot of test pain isn't technical. It's architectural. Teams mock so many children that parent tests stop reflecting the UI users see.
That usually shows up as duplicated stubs, giant test setup blocks, and mocks that hardcode success states. When you notice that pattern, don't add another helper first. Revisit the test boundary. The right fix is often to render one more real component, not invent one more fake.
If your team is standardizing Jest patterns across a growing React codebase, MakeAutomation publishes implementation-focused material on Jest mocking, including adjacent topics like class mocks, spies, and TypeScript-heavy setups.