Animation with Inkscape: A Complete Guide for 2026
Most advice about animation with Inkscape starts in the wrong place. It starts with motion.
Starting point is pipeline design. If you treat Inkscape like a full animation package, you'll fight it. If you treat it like a precise vector asset builder that feeds the right downstream workflow, it becomes far more useful.
That distinction matters for teams, not just hobbyists. B2B and SaaS companies rarely need a single handcrafted clip. They need repeatable production for product demos, onboarding visuals, animated UI assets, marketing loops, explainer graphics, and social formats. In that environment, Inkscape works best when you decide early which of three routes you're building for: frame-by-frame raster export, SVG animation with SMIL or CSS, or handoff to dedicated animation software.
Inkscape is free, open source, and built around SVG editing. That makes it a strong front end for scalable asset production. It does not give you the integrated timeline commonly expected. That isn't a minor omission. It's the core constraint that shapes every professional workflow around it.
Foundational Artwork Preparation for Animation
Animation problems in Inkscape usually start long before the first frame. They start in the file structure.
If the source art is built like a poster, every export, revision, and handoff becomes slower. If it is built like a production asset, Inkscape becomes a reliable front end for several downstream pipelines. That matters for B2B and SaaS teams that need the same illustration set to feed product GIFs, SVG microinteractions, landing-page motion, and social edits without redrawing the asset each time.
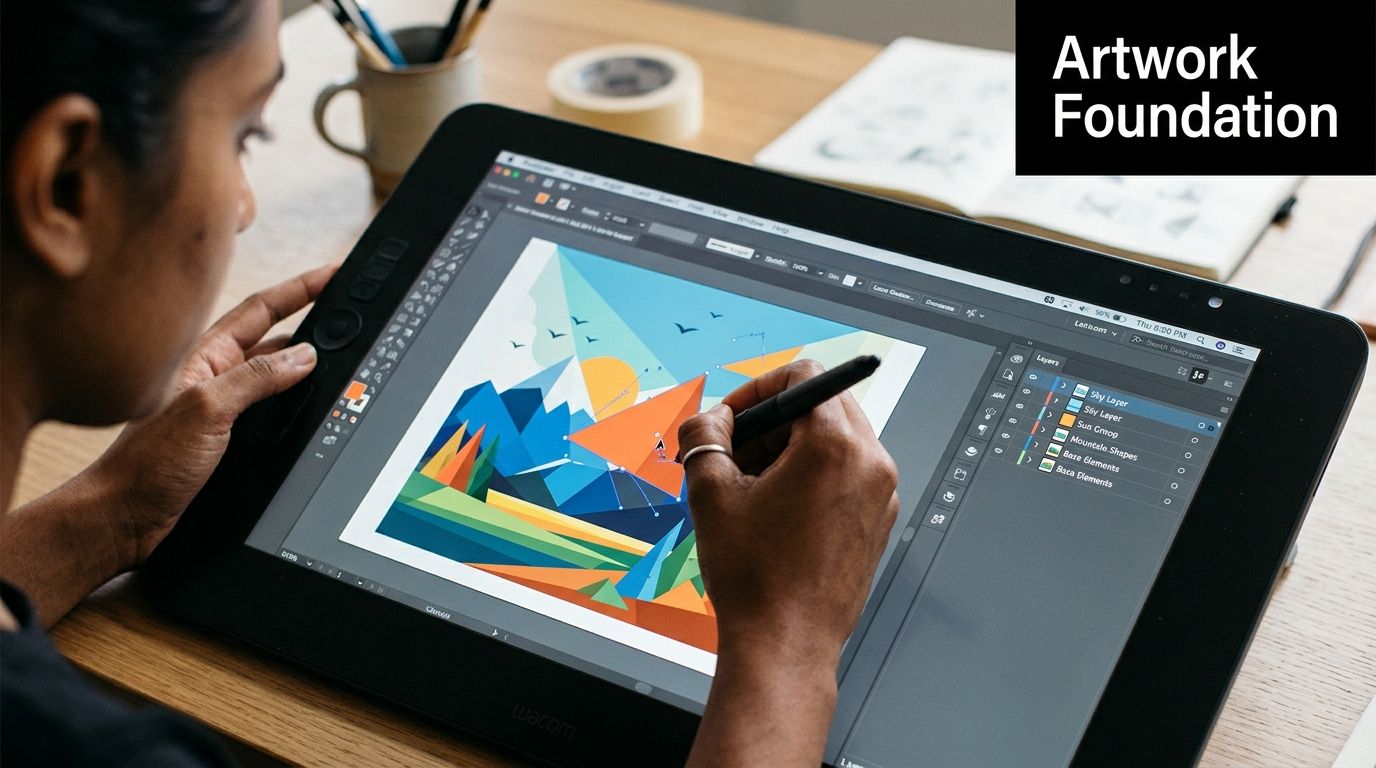
Separate every moving part
Build moving elements as independent objects from the start. Arms, hands, eyelids, buttons, cursors, chart bars, toggles, and shadows should all be editable on their own. Static illustration habits work against you here. A single merged path may look tidy in the editor, but it creates extra cleanup the moment a client asks for a blink, a hover state, or a simple rotation.
This matters even more in pipeline work. Separate objects can be duplicated for frame-by-frame animation, targeted by ID in SVG animation, or handed off cleanly to After Effects, Rive, or Blender for finishing. Combined shapes do none of that well.
Practical rule: If a part may rotate, deform, swap, hide, recolor, or export on its own, keep it separate now.
Teams that already manage design systems will recognize the pattern. Motion-ready illustration files benefit from the same discipline as reusable UI libraries. Clear structure, reusable parts, and predictable naming reduce rework across teams. If your team documents reusable patterns, these resources for user experience design can support that operational mindset.
Name layers and objects like production files
Layer names are not cosmetic. They are handoff metadata.
Use names that describe role, side, state, and order: head_front, eye_closed, arm_upper_left, arm_lower_left, card_shadow, cta_idle, cta_hover. If the artwork will move into SVG animation, object IDs often become direct hooks for CSS or SMIL. If it will move into export automation, clean names save time in scripts, batch exports, and QA.
Good naming helps with several real production tasks:
- Revision tracking because the changed element is obvious
- Export mapping because filenames and layer names stay aligned
- Developer handoff because engineers can target the right object without hunting through
path4821 - Cross-channel reuse for teams that also need to master social content production from the same illustration set
I usually treat naming as part of asset design, not cleanup. Once a file has twenty unnamed duplicates, nobody wants to fix it properly.
Set pivots before you animate
Inkscape allows custom rotation centers. Use them early.
Shoulders should rotate from the shoulder joint. A door panel should rotate from the hinge. A gauge needle should rotate from the hub. If you leave every object on its geometric center, the motion will look cheap even when the drawing quality is good.
This is one of the fastest ways to improve results. It also exposes whether the asset is modular. If setting a pivot feels awkward, the object is often built in the wrong pieces.
Build for layers, not for perfection
Clean animation prep in Inkscape depends on duplication, visibility control, and predictable stacking. That means the file has to tolerate repeated copying without surprises.
The common production method is simple. Keep a locked master pose or base state. Duplicate into a new layer with paste in place. Lower the previous layer opacity so you can judge spacing. Then edit only the parts that need to move. As noted earlier, experienced Inkscape animators use this approach because it works, even if it is more manual than a timeline-based package.
Before any animation starts, check the file against these points:
- Every movable part is separate. Mouth shapes, hands, icons, and indicators should not be welded into one path.
- Stacking order is deliberate. Front limbs, shadows, highlights, and interface overlays need a stable draw order.
- Transforms stay predictable. Random scaling and distortions create continuity problems across frames.
- A clean base version exists. Keep one untouched source layer so alternate actions and revisions do not start from a damaged pose.
- Export boundaries are known. Set document size, object alignment, and clipping areas before batch export becomes part of the pipeline.
Good animation files are boring to inspect. That is a compliment. They are easy to read, easy to duplicate, and easy to pass to the next person or tool.
The Frame-by-Frame Method for GIFs and Videos
If the goal is a polished GIF or short video, Inkscape should not be the place where playback decisions happen. It is the drafting and export stage. That sounds limiting, but in production it is often cheaper and easier to maintain than forcing a drawing tool to behave like an animation package.
For B2B and SaaS teams, that distinction matters. Inkscape handles clean vector poses, versioned artwork, and repeatable exports well. Timing, loop tuning, compositing, and final delivery belong in software built for those jobs.
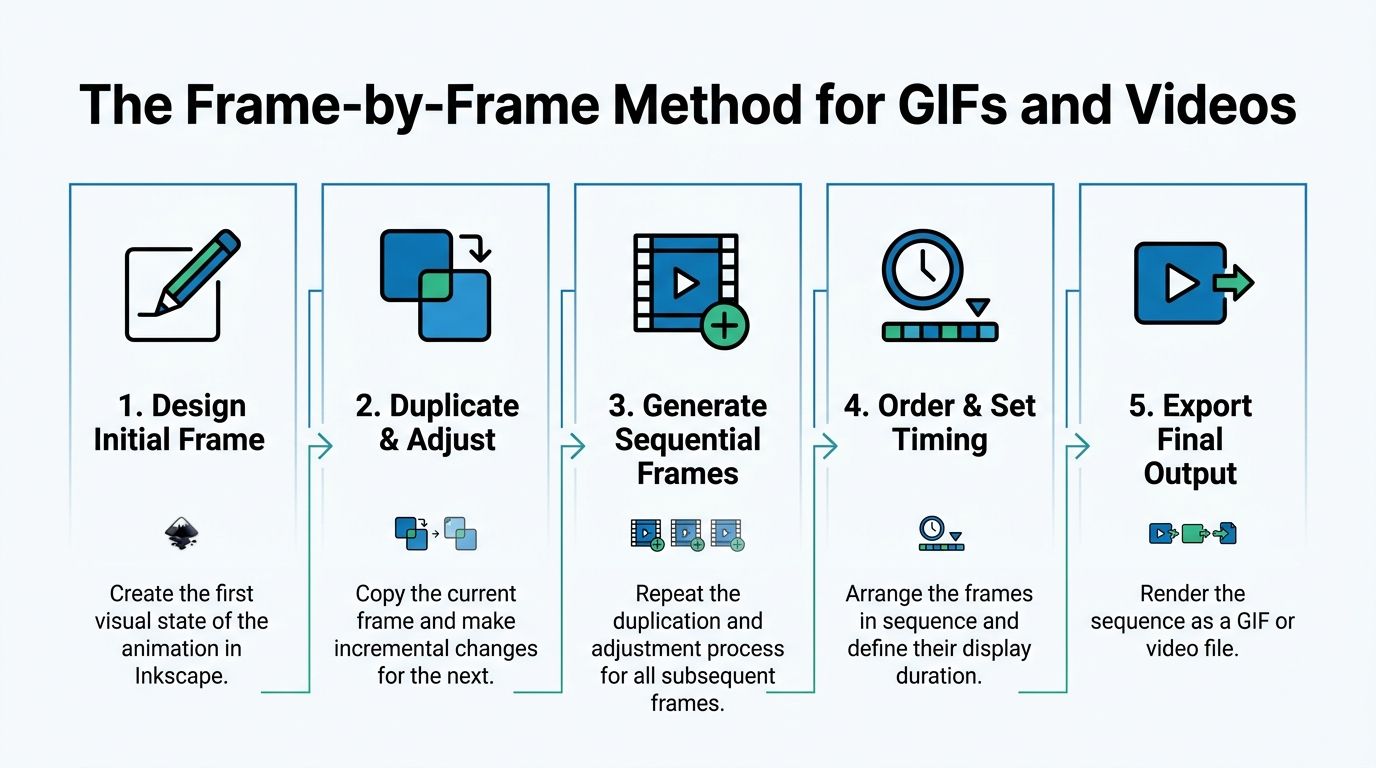
How the method works in practice
The frame-by-frame method in Inkscape is manual, but it is dependable. Create one pose per layer. Duplicate the previous frame with paste in place. Reduce the opacity of the prior frame so spacing stays readable. Edit only the parts that move.
That approach is slower than working on a real timeline. It also creates fewer surprises during review, because every frame is explicit and easy to inspect.
A production pass usually follows this order:
- Keep one approved base pose locked. That layer stays untouched so revisions have a clean source.
- Duplicate to make the next frame. Paste in place prevents drift between poses.
- Change only moving elements. Hands, facial features, interface highlights, cursors, counters, and status states are common examples.
- Lock completed frames. This prevents accidental edits and keeps the sequence stable.
- Export each frame as its own asset. Treat Inkscape as the frame generator, not the playback environment.
Export frames, then assemble elsewhere
This is the point where many tutorials get fuzzy. Professional use is usually clearer than that. Inkscape creates the drawings. Another tool handles timing and output.
For a looping GIF, export a PNG sequence and assemble it in GIMP. For a product clip, ad variation, or UI motion test, send the sequence to Blender, Synfig Studio, or an editor that gives proper control over frame duration, easing, and render settings.
That division of labor is the primary pipeline advantage. Designers can keep working in a familiar vector tool. Motion specialists or content teams can pick up approved frames without rebuilding artwork. For companies producing onboarding loops, social snippets, sales visuals, and landing page motion at scale, that separation cuts rework and makes automation easier.
| Stage | Best use of Inkscape | Better handled in another tool |
|---|---|---|
| Frame design | Pose drawing, visual consistency, frame variants | Real-time playback review |
| Export | Batch PNG output, predictable asset naming | Timing adjustments |
| Assembly | Basic handoff preparation | GIF creation, video edit, compositing, final render |
I use this method when the asset family is likely to grow. A one-off banner loop can stay simple. A campaign that will spawn ten size variants, three language versions, and two product states needs a cleaner handoff. Frame sequences are boring, but boring files are easy to automate.
For teams producing repeated campaign assets, the assembly stage often connects to a broader publishing system. If you need repeatable output across formats and channels, this guide on master social content production is useful because it treats motion assets as part of an operational workflow.
Assemble in GIMP or Blender
GIMP works well for straightforward GIF assembly. Import the PNG sequence as layers, set frame delays, test the loop, and export.
Blender is the better choice when timing needs more control or the asset is headed toward video. It handles sequencing, compositing, text overlays, and final renders more cleanly than trying to force those steps back into Inkscape.
The trade-off is simple. Inkscape gives precision at the drawing stage. It does not give a serious animation timeline. Used that way, it remains a strong first step in a professional, low-cost pipeline.
Creating Native SVG Animations with SMIL and CSS
The most underused part of animation with Inkscape is also the most web-native. Instead of exporting PNGs or video, you can keep the animation inside the SVG itself.
That approach is attractive for product interfaces, landing page illustrations, dashboard empty states, and lightweight animated icons. SVG stays sharp at any size, and the motion can live directly in the file.
Why this method is different
This isn't timeline animation. It's code-driven animation.
Inkscape animation relies on SVG and the SMIL specification, which the W3C established as an open standard in 1999, and the process requires naming objects through the XML Editor, for example setting an id such as ellipseObj, so the animation code can target that element, as shown in the EduTech Wiki guide to using Inkscape for web animation.
That means your artwork structure matters twice. It matters visually, and it matters as document markup.
A simple SMIL example
Open the XML Editor in Inkscape and make sure the object you want to animate has a unique ID. Then, in the SVG markup, you can add a small SMIL animation block.
<circle id="pulseDot" cx="40" cy="40" r="10" fill="#000000">
  <animate attributeName="r"
           values="10;14;10"
           dur="1.2s"
           repeatCount="indefinite" />
</circle>
That example changes the circle radius over time. For UI work, this is useful for pulse states, loading markers, notification hints, and subtle feedback elements.
A position animation looks similar:
<rect id="slideCard" x="0" y="0" width="80" height="40" fill="#000000">
  <animate attributeName="x"
           values="0;12;0"
           dur="0.8s"
           repeatCount="indefinite" />
</rect>
A CSS-based alternative
CSS can animate SVG elements when they have stable IDs or classes. This is often easier to maintain if the SVG lives inside a web product.
<svg viewBox="0 0 100 100" xmlns="http://www.w3.org/2000/svg">
  <style>
    #floatIcon {
      animation: bob 1.4s ease-in-out infinite;
    }
    @keyframes bob {
      0% { transform: translateY(0px); }
      50% { transform: translateY(-6px); }
      100% { transform: translateY(0px); }
    }
  </style>

  <g id="floatIcon">
    <circle cx="50" cy="50" r="12" fill="#000000" />
  </g>
</svg>
The benefit here is integration. Developers can tune timing in code without asking a designer to re-export raster frames.
This walkthrough helps if you want to see SVG animation concepts in action:
Best use cases for SaaS and web teams
Native SVG animation works well when the motion is subtle and modular.
- Interface feedback such as pulsing status dots, floating icons, and hover states
- Explainer diagrams where arrows, labels, or indicators animate on page load
- Brand illustration systems that need crisp rendering across desktop and mobile
- Embedded marketing visuals where file weight and scalability matter more than cinematic motion
SVG animation in Inkscape isn't for every job. It's for the jobs where staying vector-native is more valuable than having a rich timeline.
Integrating Inkscape into a Professional Animation Pipeline
Inkscape earns its place in production when teams stop treating it like a full animation package and start using it as the source layer of a pipeline. That shift matters. It changes hiring, file standards, review flow, and software spend.
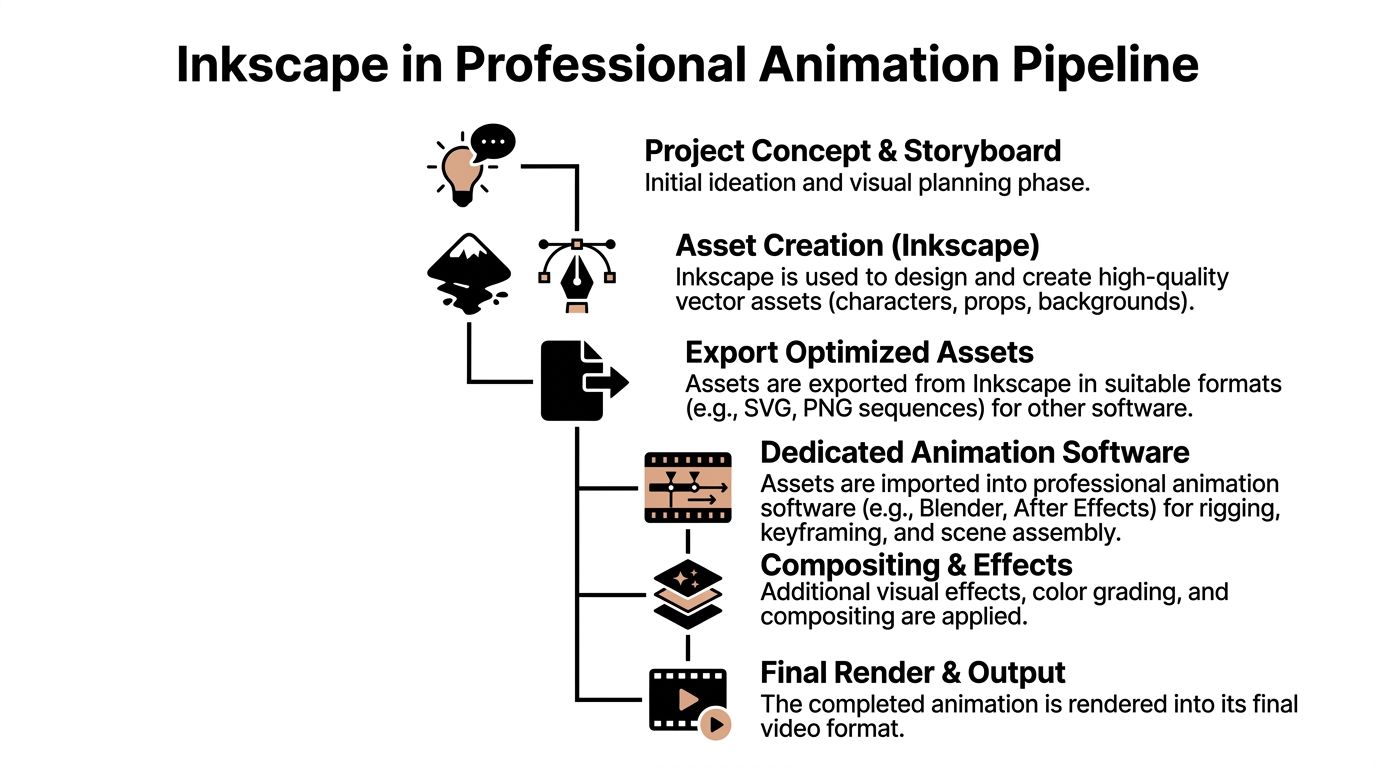
Where Inkscape fits
Inkscape handles vector construction well. It does not handle timeline animation, rigging, scene management, or delivery across every runtime format. In a professional setup, that is a strength, not a weakness. A B2B or SaaS team can keep illustration and asset prep in a zero-license tool, then reserve paid seats or specialist tools for the parts of the pipeline that need them.
That model saves money in a practical way. More contributors can create and revise source artwork without adding software overhead on every seat. Motion specialists then pick up approved SVG assets and move them into the right downstream tool for animation, compositing, or product delivery.
Comparing three common pipeline routes
The right route depends on what the business needs to ship.
| Pipeline | Best for | What Inkscape supplies | What the next tool handles |
|---|---|---|---|
| Inkscape to Synfig | Reusable 2D scenes and cutout-style motion | Layered vector parts with clean grouping | Tweening, keyframes, scene animation |
| Inkscape to Blender | Motion design, compositing, and mixed 2D/3D output | Characters, icons, diagrams, background assets | Timing, effects, camera moves, editing, final render |
| Inkscape to Lottie-style workflow | UI motion for apps and web products | Simplified vector artwork with predictable structure | Conversion, playback behavior, runtime deployment |
Each route has trade-offs. Synfig keeps the stack open-source, but teams need discipline around SVG cleanup and testing. Blender gives far more control over final output, but it adds complexity and usually benefits from a dedicated motion artist. Lottie-oriented workflows are efficient for product teams, but only if the source art stays simple enough for conversion and front-end constraints.
The handoff standard that scales
Pipelines break at handoff, not at drawing.
The teams that get repeatable output from Inkscape usually define three things early. First, Inkscape owns the source-of-truth artwork. Second, the animation tool owns motion behavior and export settings. Third, the team documents naming, grouping, versioning, and export rules so files survive more than one project cycle.
I have seen this work well when marketing, product, and engineering all touch the same illustration set. The file structure has to be boring on purpose. Clear layer names, consistent object grouping, and approved component variants prevent expensive cleanup later. The same discipline used in building a reusable design system for product teams applies directly to motion assets.
A simple standard looks like this:
- Inkscape owns master artwork for icons, scenes, character parts, and diagrams
- Animation tools own timing and behavior for loops, transitions, and renders
- Documentation owns consistency across naming, folders, revisions, and delivery specs
- Review happens at the asset stage first because fixing structure before animation is cheaper than fixing it after keyframing
That is the core value of Inkscape in a professional pipeline. It gives teams a low-cost, editable vector source they can reuse across GIF production, SVG motion, app animation, video renders, and future campaign variants without rebuilding the artwork each time.
Automating Exports and Optimizing for Performance
Once you move from a few animations to a steady stream of deliverables, manual export becomes the primary bottleneck. The drawing stage isn't usually what slows teams down. The slowdown comes from repetitive output work, file cleanup, and format variation.
Animation with Inkscape becomes an operations problem. If you need multiple sizes, multiple language variants, UI state exports, or recurring campaign refreshes, the asset file has to support automation.
Build export-friendly source files
Before thinking about scripts, fix the source file. The export process becomes easier when the document has consistent layer names, predictable artboard usage, and no mystery objects off canvas.
A production-ready Inkscape file usually follows these rules:
- Stable naming so exported files don't need manual renaming later
- One asset logic per layer group when multiple states live in one document
- Minimal stray geometry because hidden leftovers can still cause confusion during handoff
- Plain structure because simpler SVG is easier to optimize and repurpose
If your workflow eventually turns SVG assets into static deliverables for product pages, ad systems, or automated content generation, this practical guide on turning SVG code into images fits neatly into the same export mindset.
Use batch behavior as a production lever
Inkscape already supports batch-oriented export behavior through its interface, and that mindset can be extended into repeatable operating procedures. For teams, the key benefit isn't just speed on one file. It's predictability across many files.
A strong export workflow usually defines:
- Canonical source file. One maintained vector document per animation asset family.
- Output targets. PNG sequence, plain SVG, web-ready SVG, or downstream package assets.
- Naming standard. Frame order and variant naming that downstream tools can ingest without cleanup.
- QA pass. Quick checks for clipping, missing layers, wrong stacking, and export bounds.
Optimize vectors before they leave design
Heavy SVGs cause trouble in product environments. Too many nodes, messy paths, nested transforms, and unnecessary precision make files harder to maintain and slower to render.
Practical optimization means:
- Simplifying paths where visual fidelity doesn't change
- Reducing redundant nodes on curves and decorative shapes
- Cleaning hidden objects that no longer contribute to the design
- Exporting plain SVG when downstream editing or embedding requires cleaner markup
This is particularly important for web animation. A visually simple icon can still produce ugly markup if the source file is messy.
Optimization starts in the drawing file, not in the handoff meeting.
Think in asset families
The biggest operational shift is to stop producing isolated files. Build asset families instead. A SaaS company might need the same illustration as a landing page SVG, a PNG social teaser, a short looping GIF, and a frame source for product video. If the source artwork is modular, those outputs become manageable.
That's the point where Inkscape starts earning its keep in a professional environment. Not as a magic animation app, but as a reliable front end for scalable visual production.
Common Pitfalls and Expert Troubleshooting FAQs
The most common frustration with animation with Inkscape isn't a bug. It's a false expectation. People open it looking for a timeline, real-time playback, and integrated animation controls. Inkscape doesn't work like that.
That isn't a reason to avoid it. It just means the workflow has to stay honest.
Where is the animation timeline
There isn't a native one in the way most animators expect. If you're trying to do classic timeline-based animation entirely inside Inkscape, you're using the wrong mental model.
For frame-based work, the workaround is manual layer sequencing plus export. For SVG-based work, the workaround is editing markup and testing externally. For larger jobs, the workaround is to hand off to software built for motion.
Can you preview SVG or SMIL animation inside Inkscape
This is one of the clearest workflow gaps. A documented pain point is the lack of a native way to test SVG-SMIL animation inside Inkscape, with users reporting GIMP or ImageMagick as "tedious" workarounds and noting the export-debug cycle as a bottleneck, as discussed in this user thread on animating Inkscape vector art.
That means debugging interactive SVG motion is slower than it should be. You edit, export, test elsewhere, adjust, and repeat.
Why do my frame files get messy so quickly
Because editable layers are easy to touch by accident, and frame duplication multiplies small mistakes. The fix is procedural, not clever.
Use this checklist:
- Lock old frames immediately after creating the next one
- Keep one untouched master pose for recovery and branching
- Move only intended parts instead of nudging full groups casually
- Review frame order early before exporting a long sequence
Why does my SVG animation feel brittle
Usually because the artwork wasn't prepared as addressable elements. If IDs are inconsistent, groups are overly nested, or the geometry is too tangled, code-based animation becomes fragile.
A clean SVG animation file needs clear targets. Stable object IDs, sensible grouping, and restrained transforms matter more than visual complexity.
Should I use Inkscape alone for professional animation
For most professional work, no. Use it as the vector authoring stage unless the animation requirement is intentionally simple.
That answer is often disappointing to people who want one free app to do everything. But the honest pipeline is better than a forced all-in-one setup that breaks under deadlines.
The expert move isn't squeezing every task into Inkscape. It's deciding which task belongs there and which task doesn't.
What works best in real production
For companies and teams, these patterns hold up:
| Need | Best role for Inkscape |
|---|---|
| Short GIF loops | Frame drawing and PNG sequence export |
| Product UI micro-animation | SVG asset creation and ID setup |
| Explainer motion graphics | Vector asset creation before Blender or similar tools |
| Reusable marketing illustration systems | Source-of-truth vector library |
The mistake is expecting one workflow to fit all four. The better approach is choosing the pipeline first, then preparing the file to match it.
If your team needs more than isolated design tips and wants repeatable asset pipelines, export automation, and AI-assisted production systems around motion graphics and SVG workflows, MakeAutomation can help design the operational side. That includes turning creative processes into scalable systems that are easier to document, automate, and maintain across B2B and SaaS teams.